
Maintaining your garage door is essential for ensuring the safety, security, and longevity of your home. At Garage Door Pros, we excel in swift, affordable garage door solutions in Pembroke Pines and beyond. Trust us for installation and repair across Fort Lauderdale. In this blog, we will share essential garage door maintenance tips for homeowners, helping you keep your garage door in top condition. Regular maintenance not only prevents costly repairs but also enhances the overall functionality and lifespan of your garage door. From inspecting the hardware to lubricating moving parts, these practical tips will empower you to take proactive steps in maintaining your garage door. Whether you are dealing with a noisy door or looking to improve its performance, our expert advice will guide you through the process. Stay tuned to learn how to keep your garage door operating smoothly and efficiently.
Importance of Regular Garage Door Maintenance
Regular garage door maintenance is a crucial aspect of homeownership that often goes overlooked. However, neglecting this essential task can lead to a myriad of problems, from minor inconveniences to significant safety hazards. In this comprehensive guide, we will delve into the importance of regular garage door maintenance, providing you with valuable insights and actionable tips to ensure your garage door remains in optimal condition.
Enhancing Safety and Security
One of the primary reasons for regular garage door maintenance is to enhance the safety and security of your home. A malfunctioning garage door can pose serious risks to you and your family. According to the U.S. Consumer Product Safety Commission, garage doors cause approximately 20,000 injuries annually. Regular maintenance can help identify and rectify potential hazards before they lead to accidents.
“Safety should always be a top priority when it comes to garage door maintenance. Regular inspections and timely repairs can prevent accidents and ensure the well-being of your loved ones.”
Prolonging the Lifespan of Your Garage Door
A well-maintained garage door can last significantly longer than one that is neglected. Regular maintenance helps in identifying and addressing minor issues before they escalate into major problems. This proactive approach can save you from costly repairs or even the need for a complete garage door replacement. By investing a little time and effort into maintenance, you can extend the lifespan of your garage door and maximize your investment.
Improving Functionality and Performance
A garage door that operates smoothly and efficiently is a convenience that every homeowner appreciates. Regular maintenance ensures that all components of the garage door, including springs, cables, rollers, and tracks, are in optimal condition. This not only improves the functionality of the door but also enhances its overall performance. A well-maintained garage door opens and closes smoothly, reducing noise and preventing unnecessary wear and tear.
Cost Savings
Regular garage door maintenance can lead to significant cost savings in the long run. By addressing minor issues promptly, you can prevent them from developing into major problems that require expensive repairs. Additionally, a well-maintained garage door is less likely to break down unexpectedly, saving you from emergency repair costs. Investing in routine maintenance is a cost-effective strategy that pays off over time.
Maintaining Curb Appeal
Your garage door is a prominent feature of your home’s exterior and plays a crucial role in its overall curb appeal. A well-maintained garage door enhances the aesthetic appeal of your home, creating a positive impression on visitors and potential buyers. Regular cleaning, painting, and lubrication can keep your garage door looking pristine and functioning flawlessly.
Tips for Regular Garage Door Maintenance
To ensure your garage door remains in top condition, follow these essential maintenance tips:
- **Inspect and Lubricate Moving Parts:** Regularly inspect all moving parts, including springs, rollers, and hinges, for signs of wear and tear. Lubricate these components with a high-quality garage door lubricant to ensure smooth operation.
- **Check and Tighten Hardware:** Over time, the hardware on your garage door can become loose. Check and tighten all bolts, nuts, and screws to prevent any potential issues.
- **Test the Balance:** An unbalanced garage door can strain the opener and other components. Disconnect the opener and manually open the door halfway. If it stays in place, it is properly balanced. If not, it may require adjustment.
- **Inspect the Weatherstripping:** The weatherstripping on the bottom of your garage door helps keep out dirt, debris, and weather elements. Check for any damage or wear and replace it if necessary.
- **Clean and Paint:** Regularly clean your garage door to remove dirt and grime. If your door is made of wood, consider repainting it periodically to protect it from the elements.
- **Test the Auto-Reverse Feature:** Modern garage doors are equipped with an auto-reverse feature that prevents the door from closing if it detects an obstruction. Test this feature regularly to ensure it is functioning correctly.
Professional Maintenance Services
While homeowners can perform many maintenance tasks themselves, some aspects of garage door maintenance require professional expertise. Hiring a professional garage door technician for regular inspections and maintenance can provide peace of mind and ensure that your garage door remains in optimal condition. Professionals have the knowledge and tools to identify and address issues that may not be apparent to the untrained eye.
For more information on professional garage door maintenance services, visit our service page or contact us for expert assistance.
Conclusion
Regular garage door maintenance is an essential aspect of homeownership that should not be overlooked. By prioritizing safety, prolonging the lifespan of your garage door, improving functionality, and saving on costs, you can ensure that your garage door remains in optimal condition for years to come. Follow the maintenance tips provided in this guide and consider professional maintenance services for comprehensive care.
For more insights and tips on garage door maintenance, visit our blog or explore our types of garage doors to find the perfect fit for your home. Remember, a well-maintained garage door is not just a convenience but a crucial component of your home’s safety and security.
Inspecting and Tightening Hardware
One of the most critical aspects of garage door maintenance is inspecting and tightening the hardware. This process ensures that your garage door operates smoothly and safely, reducing the risk of unexpected malfunctions and extending the lifespan of the door. Regular inspection and tightening of hardware can prevent costly repairs and enhance the overall performance of your garage door system. Here’s a comprehensive guide to help you understand the importance of this task and how to perform it effectively.
Why Inspecting and Tightening Hardware is Essential
Garage doors are composed of numerous moving parts that work together to facilitate smooth operation. Over time, these parts can become loose due to constant use, vibrations, and environmental factors. Loose hardware can lead to misalignment, increased wear and tear, and even complete failure of the garage door system. By regularly inspecting and tightening the hardware, you can:
- Ensure Safety: A loose bolt or screw can cause the garage door to malfunction, posing a safety risk to you and your family. Regular maintenance helps prevent accidents and injuries.
- Improve Performance: Tight hardware ensures that the garage door operates smoothly and quietly. This can enhance the overall user experience and reduce noise pollution.
- Extend Lifespan: Properly maintained hardware reduces the strain on other components of the garage door system, thereby extending the lifespan of the door and its parts.
- Prevent Costly Repairs: Identifying and addressing loose hardware early can prevent more significant issues that require expensive repairs or replacements.
Steps to Inspect and Tighten Hardware
1. Gather Necessary Tools
Before you begin, make sure you have the following tools on hand:
- Wrench set
- Screwdriver set
- Socket set
- Lubricant spray
- Safety gloves and goggles
2. Disconnect the Garage Door Opener
For safety reasons, always disconnect the garage door opener before performing any maintenance. This prevents the door from moving unexpectedly while you are working on it.
3. Inspect the Hardware
Carefully examine all the hardware components of your garage door, including:
- Bolts and Screws: Check for any loose or missing bolts and screws on the brackets, hinges, and tracks. Tighten any loose ones and replace missing ones.
- Rollers and Hinges: Inspect the rollers and hinges for signs of wear and tear. Ensure they are securely attached and functioning correctly.
- Tracks: Examine the tracks for any bends or misalignment. Make sure they are securely fastened to the walls and ceiling.
- Springs: Look for signs of wear or damage on the springs. If you notice any issues, it’s best to contact a professional for garage door spring repair service.
4. Tighten the Hardware
Using the appropriate tools, tighten all the loose bolts, screws, and nuts. Be careful not to overtighten, as this can strip the threads or damage the components. Focus on the following areas:
- Brackets: Tighten the brackets that hold the tracks to the walls and ceiling.
- Hinges: Ensure the hinges that connect the door panels are secure.
- Roller Brackets: Tighten the roller brackets to ensure smooth operation of the rollers.
5. Lubricate Moving Parts
After tightening the hardware, lubricate the moving parts to reduce friction and ensure smooth operation. Use a high-quality lubricant spray on the rollers, hinges, and tracks. Avoid using grease, as it can attract dirt and debris.
6. Test the Garage Door
Reconnect the garage door opener and test the door to ensure it operates smoothly and quietly. Open and close the door several times to check for any unusual noises or movements. If you notice any issues, re-inspect the hardware and make necessary adjustments.
When to Call a Professional
While inspecting and tightening hardware is a task that most homeowners can handle, there are situations where professional assistance is necessary. If you encounter any of the following issues, it’s best to contact a professional garage door service:
- Broken Springs: Handling garage door springs can be dangerous due to the high tension they are under. If you notice any issues with the springs, contact a professional for garage door spring repair service.
- Damaged Tracks: Bent or misaligned tracks can cause significant problems with the operation of your garage door. A professional can realign or replace the tracks as needed.
- Persistent Issues: If you continue to experience problems with your garage door despite tightening the hardware, it’s best to have a professional inspect the system for underlying issues.
Conclusion
Regularly inspecting and tightening the hardware of your garage door is a crucial maintenance task that can enhance safety, improve performance, and extend the lifespan of your garage door system. By following the steps outlined in this guide, you can ensure that your garage door operates smoothly and reliably. However, if you encounter any complex issues or need professional assistance, don’t hesitate to contact a trusted garage door service provider. For more information on garage door maintenance and repair services, visit our blog or contact us today.
Lubricating Moving Parts
One of the most crucial aspects of maintaining your garage door is ensuring that all moving parts are adequately lubricated. Proper lubrication not only extends the lifespan of your garage door but also ensures smooth and quiet operation. Neglecting this essential maintenance task can lead to increased friction, wear and tear, and ultimately, costly repairs. Here’s a comprehensive guide on how to effectively lubricate the moving parts of your garage door.
Why Lubrication is Important
Lubrication plays a vital role in the overall functionality of your garage door. It reduces friction between moving parts, which in turn minimizes wear and tear. This simple maintenance task can prevent common issues such as squeaking, grinding, and sticking. Moreover, well-lubricated components operate more efficiently, reducing the strain on your garage door opener and other mechanical parts.
Identifying the Parts that Need Lubrication
Before you start, it’s essential to know which parts of your garage door require lubrication. The key components include:
- Hinges: These connect the panels of your garage door and allow it to bend as it opens and closes.
- Rollers: These guide the door along the tracks.
- Springs: These provide the necessary tension to lift and lower the door.
- Tracks: Although they don’t require lubrication, keeping them clean is essential for smooth operation.
- Locks: These ensure the security of your garage door.
Choosing the Right Lubricant
Not all lubricants are suitable for garage doors. It’s crucial to use a high-quality, silicone-based or lithium-based spray lubricant. Avoid using WD-40 or other penetrating oils, as they can attract dirt and grime, leading to more problems in the long run.
Step-by-Step Guide to Lubricating Your Garage Door
1. Preparation
Before you begin, gather all necessary tools and materials. You’ll need a silicone-based or lithium-based spray lubricant, a clean cloth, and possibly a ladder for hard-to-reach areas. Make sure to disconnect the garage door opener to prevent any accidental operation while you’re working.
2. Clean the Tracks
Although the tracks themselves don’t need lubrication, they should be clean for the rollers to move smoothly. Use a damp cloth to wipe away any dirt, dust, or debris. For stubborn grime, a mild household cleaner can be used. Ensure the tracks are completely dry before proceeding.
3. Lubricate the Hinges
Spray a small amount of lubricant on each hinge where it pivots. Open and close the door a few times to work the lubricant into the hinge. This will help reduce any squeaking and ensure smooth movement.
4. Lubricate the Rollers
The rollers are crucial for the smooth operation of your garage door. Apply lubricant to the ball bearings inside the rollers. If your rollers are nylon, be careful not to get lubricant on the nylon itself, as it can degrade the material. Metal rollers, on the other hand, can be fully lubricated.
5. Lubricate the Springs
Springs are under high tension and should be handled with care. Apply a generous amount of lubricant to the torsion springs located above the door. This will help reduce noise and ensure they can expand and contract smoothly. Extension springs, found along the sides of the door, should also be lubricated.
6. Lubricate the Locks
If your garage door has a manual lock, spray a small amount of lubricant into the keyhole and other moving parts. This will ensure the lock operates smoothly and doesn’t get stuck.
7. Test the Door
After lubricating all the necessary parts, reconnect the garage door opener and test the door. Open and close it a few times to ensure everything is operating smoothly. Listen for any unusual noises and check for any sticking or jerking movements.
Additional Tips for Effective Lubrication
- Frequency: Lubricate your garage door every six months to keep it in optimal condition. In areas with extreme weather conditions, more frequent lubrication may be necessary.
- Inspection: Regularly inspect all moving parts for signs of wear and tear. Replace any damaged components promptly to prevent further issues.
- Professional Help: If you’re unsure about any aspect of lubricating your garage door, consider seeking professional assistance. Experts can provide comprehensive maintenance and address any underlying issues.
Common Mistakes to Avoid
- Over-Lubrication: Applying too much lubricant can attract dust and dirt, leading to more problems. Use a moderate amount and wipe away any excess.
- Ignoring the Opener: While the focus is on the door itself, don’t forget to check the garage door opener. Some parts of the opener, such as the chain or screw drive, may also require lubrication.
- Using the Wrong Lubricant: As mentioned earlier, avoid using penetrating oils like WD-40. These can cause more harm than good by attracting dirt and grime.
Conclusion
Proper lubrication is a simple yet effective way to maintain your garage door and ensure its longevity. By regularly lubricating the moving parts, you can prevent common issues and avoid costly repairs. Remember to use the right type of lubricant and follow the steps outlined in this guide for the best results.
For more detailed information on garage door maintenance, you can visit our blog or check out our FAQ section. If you need professional assistance, don’t hesitate to contact us. Proper maintenance is key to a smoothly operating and long-lasting garage door.
Testing the Garage Door Balance
Maintaining your garage door is crucial for ensuring its longevity and smooth operation. One of the essential aspects of garage door maintenance is testing the balance of the door. An imbalanced garage door can lead to various issues, including increased wear and tear on the door components, potential safety hazards, and even complete system failure. In this guide, we will walk you through the steps to test your garage door balance and provide tips on what to do if you find any issues.
Why Testing Garage Door Balance is Important
A balanced garage door is vital for several reasons:
- Safety: An imbalanced door can unexpectedly fall, posing a significant risk to anyone nearby.
- Efficiency: A balanced door operates smoothly, reducing strain on the opener and other components.
- Longevity: Proper balance minimizes wear and tear, extending the life of your garage door system.
How to Test Your Garage Door Balance
Step 1: Prepare for the Test
Before you begin, ensure that your garage door is closed. Disconnect the automatic garage door opener by pulling the release handle. This step is crucial as it allows you to manually operate the door without interference from the opener.
Step 2: Lift the Door Manually
With the opener disengaged, lift the garage door manually. Pay attention to how the door feels as you lift it. A balanced door should feel relatively light and easy to lift. If the door feels heavy or difficult to lift, it may be imbalanced.
Step 3: Check the Midway Point
Lift the door to the halfway point and then let go. A balanced garage door should stay in place without moving up or down. If the door falls or rises, it indicates an imbalance. This imbalance could be due to issues with the springs or other components.
Step 4: Observe the Door’s Movement
Raise and lower the door a few times to observe its movement. A balanced door should move smoothly without any jerking or resistance. If you notice any unusual movements, it could be a sign of an underlying issue that needs to be addressed.
Common Causes of Garage Door Imbalance
Several factors can cause a garage door to become imbalanced:
- Worn Springs: Over time, the springs that help lift the door can wear out or lose tension, leading to imbalance. For more information on spring-related issues, visit our garage door broken springs repair page.
- Damaged Cables: The cables that assist in lifting the door can fray or break, causing the door to become uneven.
- Misaligned Tracks: If the tracks that guide the door are misaligned, it can cause the door to move unevenly.
- Worn Rollers: Rollers that are worn out or damaged can affect the door’s movement and balance.
What to Do If Your Garage Door is Imbalanced
If you find that your garage door is imbalanced, it’s essential to address the issue promptly to avoid further damage or safety risks. Here are some steps you can take:
Inspect the Springs
Check the condition of the springs. If they appear worn or damaged, they may need to be replaced. Replacing garage door springs can be dangerous, so it’s best to hire a professional for this task. For expert assistance, consider our garage door spring repair service in Weston.
Examine the Cables
Inspect the cables for any signs of fraying or damage. If you notice any issues, it’s crucial to replace the cables immediately to prevent further problems.
Check the Tracks and Rollers
Ensure that the tracks are properly aligned and free of debris. Clean the tracks and lubricate the rollers to ensure smooth operation. If the tracks are severely misaligned or the rollers are damaged, you may need to replace them.
Seek Professional Help
If you’re unsure about how to fix the imbalance or if the issue seems complex, it’s best to seek professional help. A qualified technician can diagnose the problem and provide the necessary repairs. For reliable service, visit our garage door repair service in Davie, FL.
Preventive Maintenance Tips
To keep your garage door balanced and functioning correctly, regular maintenance is essential. Here are some preventive maintenance tips:
Regular Inspections
Perform regular inspections of your garage door components, including springs, cables, tracks, and rollers. Look for any signs of wear or damage and address them promptly.
Lubrication
Lubricate the moving parts of your garage door, such as the rollers, hinges, and springs, to ensure smooth operation. Use a high-quality garage door lubricant for the best results.
Tighten Hardware
Over time, the hardware on your garage door can become loose. Regularly check and tighten any loose bolts or screws to keep the door secure.
Balance Test
Perform a balance test every few months to ensure that your garage door remains properly balanced. This simple test can help you catch any issues early and prevent more significant problems down the line.
Conclusion
Testing the balance of your garage door is a crucial part of regular maintenance. An imbalanced door can lead to various issues, including safety hazards and increased wear and tear on the door components. By following the steps outlined in this guide, you can ensure that your garage door remains balanced and operates smoothly.
If you encounter any issues or need professional assistance, don’t hesitate to reach out to our team. We offer a range of services, including garage door repair and maintenance, to help keep your garage door in top condition. For more information or to schedule a service, visit our contact us page.
Checking and Replacing Weather Stripping
Weather stripping is a crucial component of your garage door system, often overlooked by homeowners. It serves as a barrier against the elements, preventing rain, wind, and debris from entering your garage. Over time, weather stripping can wear out, crack, or become damaged, compromising its effectiveness. Regularly checking and replacing weather stripping is an essential part of garage door maintenance that can save you from costly repairs and improve energy efficiency.
Why Weather Stripping Matters
Weather stripping plays a vital role in maintaining the integrity of your garage. It helps in:
- Energy Efficiency: Proper weather stripping seals gaps around your garage door, reducing heat loss in winter and keeping the garage cooler in summer. This can lower your energy bills.
- Protection from Elements: It prevents rain, snow, and wind from entering your garage, protecting your belongings and the structure itself.
- Pest Control: Effective weather stripping keeps out insects and rodents that might otherwise find their way into your garage.
- Noise Reduction: It can also help in reducing noise from outside, making your garage a quieter space.
How to Check Weather Stripping
Regular inspection of your garage door weather stripping can help you identify issues before they become major problems. Here’s how to do it:
- Visual Inspection: Look for visible signs of wear and tear, such as cracks, gaps, or sections that have come loose.
- Feel for Drafts: On a windy day, run your hand along the edges of the garage door from the inside. If you feel a draft, it’s a sign that the weather stripping is not sealing properly.
- Water Test: During a rainstorm, check the inside of your garage door for any signs of water intrusion. If you notice any wet spots, your weather stripping may need to be replaced.
Replacing Weather Stripping
If you’ve determined that your weather stripping needs to be replaced, follow these steps to ensure a proper installation:
- Gather Materials: You’ll need new weather stripping, a utility knife, a measuring tape, and adhesive or nails, depending on the type of weather stripping you choose.
- Remove Old Weather Stripping: Carefully remove the old weather stripping. If it’s nailed in, use a pry bar to remove the nails. If it’s adhesive, peel it off slowly to avoid damaging the door.
- Clean the Surface: Clean the area where the new weather stripping will be applied. Remove any old adhesive residue and ensure the surface is dry.
- Measure and Cut: Measure the length of the garage door and cut the new weather stripping to fit. It’s better to cut it slightly longer and trim it down if needed.
- Install New Weather Stripping: Apply the new weather stripping according to the manufacturer’s instructions. Ensure it’s aligned properly and forms a tight seal when the door is closed.
Types of Weather Stripping
There are several types of weather stripping available, each with its own advantages:
- Vinyl Weather Stripping: Durable and flexible, vinyl is a popular choice for garage doors. It’s resistant to moisture and can withstand extreme temperatures.
- Rubber Weather Stripping: Rubber provides an excellent seal and is highly durable. It’s ideal for areas with heavy rainfall or snow.
- Foam Weather Stripping: Foam is easy to install and provides good insulation. However, it may not be as durable as vinyl or rubber.
- Brush Weather Stripping: This type uses bristles to seal gaps. It’s effective for keeping out dust and small pests but may not provide the best insulation.
When to Call a Professional
While replacing weather stripping is a task many homeowners can handle, there are times when it’s best to call a professional. If you’re unsure about the type of weather stripping to use or if the garage door itself needs repairs, a professional can provide expert advice and service. For more information on professional services, visit our service page.
Additional Maintenance Tips
In addition to checking and replacing weather stripping, consider these other maintenance tips to keep your garage door in top condition:
- Lubricate Moving Parts: Regularly lubricate the hinges, rollers, and tracks to ensure smooth operation.
- Inspect Springs and Cables: Check for signs of wear and tear on the springs and cables. If you notice any issues, it’s best to contact a professional for repairs. For more details, visit our garage door spring repair service in Weston page.
- Test the Balance: Disconnect the opener and manually lift the door halfway. If it stays in place, it’s balanced. If it falls, the springs may need adjustment.
- Check the Auto-Reverse Feature: Place an object in the door’s path and close it. The door should reverse upon contact. If it doesn’t, the auto-reverse feature needs adjustment.
Conclusion
Regularly checking and replacing weather stripping is a simple yet effective way to maintain your garage door. It enhances energy efficiency, protects against the elements, and keeps pests at bay. By following the steps outlined above, you can ensure your garage door remains in excellent condition. For more comprehensive maintenance tips and professional services, explore our blog and contact us for expert assistance.
Cleaning and Painting the Garage Door
Maintaining your garage door is crucial for ensuring its longevity and functionality. One of the most important aspects of garage door maintenance is keeping it clean and well-painted. This not only enhances the curb appeal of your home but also protects the door from the elements, preventing rust and other damage. Here’s a comprehensive guide on how to clean and paint your garage door effectively.
Cleaning Your Garage Door
Gather Your Supplies
Before you start, make sure you have all the necessary supplies. You will need:
- A bucket
- Mild detergent or car wash soap
- A soft cloth or sponge
- A hose or pressure washer
- A soft-bristle brush
- A ladder (if your garage door is tall)
- Protective gloves
Step-by-Step Cleaning Process
- Remove Surface Dirt and Debris: Begin by using a hose or pressure washer to remove loose dirt and debris from the surface of the garage door. This will make the subsequent cleaning steps more effective.
- Prepare the Cleaning Solution: Fill a bucket with warm water and add a small amount of mild detergent or car wash soap. Avoid using harsh chemicals as they can damage the door’s finish.
- Scrub the Door: Dip a soft cloth or sponge into the soapy water and gently scrub the door. Pay special attention to areas with stubborn dirt or stains. For textured surfaces, use a soft-bristle brush to get into the crevices.
- Rinse Thoroughly: Once you’ve scrubbed the entire door, rinse it thoroughly with clean water to remove any soap residue. Soap left on the door can attract more dirt and grime.
- Dry the Door: Use a clean, dry cloth to wipe down the door. This will prevent water spots and streaks from forming.
- Inspect for Damage: While cleaning, take the opportunity to inspect the door for any signs of damage, such as rust, dents, or peeling paint. Addressing these issues promptly can prevent more serious problems down the line.
Painting Your Garage Door
Choose the Right Paint and Tools
Selecting the right paint is crucial for a long-lasting finish. Opt for exterior-grade paint that is designed to withstand the elements. You will also need:
- Primer (if the door is bare metal or wood)
- Paintbrushes and rollers
- Painter’s tape
- Drop cloths or plastic sheeting
- Sandpaper (if needed)
- A ladder
Step-by-Step Painting Process
- Prepare the Surface: If your garage door has peeling paint or rust, use sandpaper to smooth the surface. For metal doors, a wire brush can help remove rust. Clean the door again to remove any dust or debris from sanding.
- Protect Surrounding Areas: Use painter’s tape to mask off areas you don’t want to paint, such as handles, windows, and trim. Lay down drop cloths or plastic sheeting to protect the driveway and garage floor.
- Apply Primer: If your garage door is bare metal or wood, apply a coat of primer. This will help the paint adhere better and provide a more uniform finish. Allow the primer to dry completely according to the manufacturer’s instructions.
- Paint the Door: Start by painting the edges and any recessed areas with a brush. Then, use a roller to apply paint to the larger, flat surfaces. Apply thin, even coats to avoid drips and runs. It’s better to apply multiple thin coats than one thick coat.
- Allow to Dry: Let the first coat of paint dry completely before applying a second coat. This usually takes a few hours, but check the paint can for specific drying times. Apply a second coat for a more durable and even finish.
- Remove Tape and Clean Up: Once the final coat is dry, carefully remove the painter’s tape and clean up any drips or spills. Dispose of used materials properly.
Additional Tips for Garage Door Maintenance
- Regular Inspections: Make it a habit to inspect your garage door regularly for signs of wear and tear. Look for issues like broken springs, misaligned tracks, or worn-out rollers. If you notice any problems, consider reaching out to a professional for garage door repair services.
- Lubrication: Keep the moving parts of your garage door well-lubricated to ensure smooth operation. Use a silicone-based lubricant on the hinges, rollers, and tracks.
- Weatherstripping: Check the weatherstripping around your garage door for signs of wear. Replacing worn weatherstripping can improve energy efficiency and keep out pests and debris.
- Professional Maintenance: While DIY maintenance is important, it’s also a good idea to have your garage door professionally serviced at least once a year. A professional can identify and fix issues that you might overlook. For more information on professional services, visit our about page.
Conclusion
Cleaning and painting your garage door are essential tasks that can significantly extend its lifespan and enhance the appearance of your home. By following the steps outlined above, you can keep your garage door looking great and functioning smoothly for years to come. Remember, regular maintenance is key to preventing costly repairs and ensuring the safety and security of your home. If you have any questions or need professional assistance, don’t hesitate to contact us.
Examining the Cables and Pulleys
When it comes to maintaining your garage door, one of the most critical aspects to focus on is the condition of the cables and pulleys. These components play a vital role in the smooth operation of your garage door, ensuring that it opens and closes efficiently and safely. Neglecting to inspect and maintain these parts can lead to serious issues, including the door becoming stuck or even falling, which can pose a significant safety hazard. In this section, we will delve into the importance of examining the cables and pulleys, how to identify potential problems, and the steps you can take to ensure they remain in optimal condition.
Understanding the Role of Cables and Pulleys
Garage door cables and pulleys work together to lift and lower the door. The cables are typically made of strong, flexible steel and are attached to the door’s bottom brackets. They wind around drums at the top of the door, which are connected to the torsion springs. The pulleys, on the other hand, help guide the cables and distribute the weight of the door evenly. This system allows the door to move smoothly along its tracks.
Signs of Wear and Tear
Over time, the cables and pulleys can experience wear and tear due to constant use. It’s essential to regularly inspect these components for any signs of damage. Here are some common indicators that your cables and pulleys may need attention:
- Fraying or Rusting Cables: If you notice that the cables are starting to fray or show signs of rust, it’s a clear indication that they are weakening and may eventually snap. This can cause the door to become unbalanced or even fall unexpectedly.
- Worn or Damaged Pulleys: Pulleys can wear out over time, especially if they are not properly lubricated. Look for signs of wear such as grooves or cracks in the pulley wheels. Damaged pulleys can cause the cables to slip or become misaligned, leading to operational issues.
- Unusual Noises: If you hear squeaking, grinding, or other unusual noises when operating your garage door, it could be a sign that the cables or pulleys are not functioning correctly. These noises often indicate that the components are under stress and may be close to failing.
Steps for Inspecting and Maintaining Cables and Pulleys
Regular inspection and maintenance of your garage door cables and pulleys can help prevent costly repairs and ensure the safety of your household. Here are some steps you can take to keep these components in good condition:
- Visual Inspection: Start by visually inspecting the cables and pulleys for any signs of wear and tear. Look for frayed or rusted cables and check the pulleys for any visible damage. If you notice any issues, it’s best to address them immediately to prevent further damage.
- Lubrication: Proper lubrication is essential for the smooth operation of the pulleys. Use a high-quality garage door lubricant to lubricate the pulley wheels and the cables. This will help reduce friction and prevent wear and tear.
- Tension Adjustment: The tension of the cables is crucial for the proper functioning of the garage door. If the cables are too loose or too tight, it can cause the door to become unbalanced. Adjust the tension as needed to ensure that the door operates smoothly. If you’re unsure how to do this, it’s best to consult a professional.
- Professional Inspection: While regular DIY inspections are important, it’s also a good idea to have a professional inspect your garage door system periodically. A professional technician can identify potential issues that you may have missed and provide expert maintenance to keep your door in top condition. If you’re in need of professional assistance, consider reaching out to our service team.
When to Replace Cables and Pulleys
Even with regular maintenance, there will come a time when the cables and pulleys need to be replaced. Here are some scenarios where replacement is necessary:
- Severe Damage: If the cables are severely frayed, rusted, or broken, they should be replaced immediately. Similarly, if the pulleys are cracked or worn out, replacement is necessary to ensure the safe operation of the door.
- Frequent Issues: If you find yourself frequently dealing with cable or pulley problems, it may be more cost-effective to replace them rather than continually repairing them. This can help prevent further damage to other components of the garage door system.
- Age: Over time, even the highest-quality cables and pulleys will wear out. If your garage door system is several years old and you haven’t replaced these components, it may be time to do so as a preventative measure.
Conclusion
Maintaining the cables and pulleys of your garage door is crucial for ensuring its safe and efficient operation. Regular inspections, proper lubrication, and timely replacements can help prevent serious issues and extend the lifespan of your garage door system. By taking the time to care for these components, you can avoid costly repairs and ensure the safety of your household.
If you have any questions or need professional assistance with your garage door maintenance, don’t hesitate to contact us. Our team of experts is here to help you keep your garage door in top condition. For more information on garage door maintenance and repair, visit our blog.
Testing the Auto-Reverse Safety Features
Ensuring the safety of your garage door is paramount, and one of the most critical aspects of this is testing the auto-reverse safety features. This feature is designed to prevent accidents and injuries by automatically reversing the direction of the garage door if it encounters an obstruction while closing. Regularly testing and maintaining this feature can help you avoid potential hazards and ensure the longevity of your garage door system. Here’s a comprehensive guide to help you understand and test the auto-reverse safety features of your garage door.
Understanding the Auto-Reverse Safety Feature
The auto-reverse safety feature is a built-in mechanism in modern garage door openers that detects obstacles in the path of the closing door. When an obstruction is detected, the door automatically reverses direction to prevent damage or injury. This feature is crucial for the safety of your family, pets, and property.
Why Testing the Auto-Reverse Safety Feature is Important
Regular testing of the auto-reverse safety feature is essential for several reasons:
- Safety Assurance: Ensuring that the feature is functioning correctly can prevent accidents and injuries.
- Compliance with Regulations: Many local building codes and regulations require that garage doors have a functioning auto-reverse feature.
- Preventing Damage: A malfunctioning auto-reverse feature can lead to damage to your vehicle or other items stored in the garage.
- Peace of Mind: Knowing that your garage door is operating safely and efficiently provides peace of mind.
How to Test the Auto-Reverse Safety Feature
Testing the auto-reverse safety feature is a straightforward process that you can perform yourself with minimal tools. Here’s a step-by-step guide:
Step 1: Prepare for the Test
Before you begin, ensure that the area around the garage door is clear of any obstructions. This will allow you to conduct the test safely and accurately.
Step 2: Test the Mechanical Auto-Reverse
- Place an Object in the Door’s Path: Use a sturdy object, such as a wooden block or a roll of paper towels, and place it on the ground in the path of the closing garage door.
- Close the Garage Door: Use the garage door opener to close the door. As the door comes into contact with the object, it should automatically reverse direction.
- Observe the Reaction: If the door reverses direction upon contact with the object, the mechanical auto-reverse feature is functioning correctly. If it does not, you may need to adjust the sensitivity settings or consult a professional for repairs.
Step 3: Test the Photoelectric Sensors
Most modern garage doors are equipped with photoelectric sensors that detect obstructions using an infrared beam. Here’s how to test them:
- Locate the Sensors: The sensors are typically mounted on either side of the garage door, about six inches above the ground.
- Block the Beam: Use an object, such as a broomstick, to block the infrared beam between the sensors.
- Close the Garage Door: Attempt to close the garage door using the opener. The door should not close if the beam is blocked. Instead, it should reverse direction.
- Check the Alignment: If the door does not reverse, check the alignment of the sensors. They should be facing each other directly. Adjust them if necessary and retest.
Troubleshooting Common Issues
If your garage door does not pass the auto-reverse tests, there are a few common issues that you can troubleshoot:
- Sensitivity Settings: The sensitivity settings on your garage door opener may need adjustment. Refer to your owner’s manual for instructions on how to adjust these settings.
- Dirty or Misaligned Sensors: Dirt or debris on the photoelectric sensors can interfere with their operation. Clean the sensors and ensure they are properly aligned.
- Worn or Damaged Components: Over time, components of the garage door system can wear out or become damaged. Inspect the system for any signs of wear and tear and replace any damaged parts.
When to Call a Professional
While many homeowners can perform basic tests and adjustments, some issues may require professional assistance. If you encounter any of the following situations, it’s best to contact a professional:
- Persistent Malfunctions: If the auto-reverse feature continues to malfunction despite your efforts, a professional can diagnose and repair the issue.
- Complex Repairs: Some repairs, such as those involving the garage door springs or opener motor, can be complex and dangerous. It’s best to leave these to the experts.
- Regular Maintenance: Scheduling regular maintenance with a professional can help ensure that all aspects of your garage door system are functioning correctly.
For professional assistance, you can reach out to our expert team at Garage Door FL. We offer comprehensive garage door maintenance and repair services to keep your system in top condition.
Additional Tips for Garage Door Maintenance
In addition to testing the auto-reverse safety features, there are several other maintenance tasks that homeowners should perform regularly:
- Lubricate Moving Parts: Regularly lubricate the moving parts of your garage door, such as the rollers, hinges, and tracks, to ensure smooth operation.
- Inspect the Door Balance: A properly balanced garage door will operate more efficiently and reduce strain on the opener. Disconnect the opener and manually lift the door halfway. It should stay in place. If it doesn’t, the door may be out of balance.
- Check the Weatherstripping: Inspect the weatherstripping along the bottom of the door for signs of wear and tear. Replace it if necessary to keep out drafts and pests.
- Test the Manual Release: Familiarize yourself with the manual release mechanism on your garage door opener. This will allow you to open the door manually in case of a power outage.
For more detailed maintenance tips and advice, visit our blog.
Conclusion
Regularly testing the auto-reverse safety features of your garage door is a crucial part of maintaining a safe and functional system. By following the steps outlined above, you can ensure that your garage door operates safely and efficiently. Remember, if you encounter any issues or need professional assistance, don’t hesitate to contact us. Our team of experts is here to help with all your garage door maintenance and repair needs.
Maintaining the Garage Door Opener
Maintaining your garage door opener is a crucial aspect of overall garage door maintenance. A well-functioning garage door opener ensures that your garage door operates smoothly and safely. Regular maintenance can also extend the lifespan of your garage door opener, saving you from costly repairs or replacements. Here are some essential tips for maintaining your garage door opener effectively.
Regular Inspection
The first step in maintaining your garage door opener is to conduct regular inspections. Check the various components of the opener, including the motor, drive belt or chain, and the rail. Look for signs of wear and tear, such as frayed belts, loose chains, or unusual noises during operation. If you notice any issues, it’s best to address them immediately to prevent further damage.
Lubrication
Lubrication is key to ensuring that your garage door opener operates smoothly. Apply a high-quality lubricant to the moving parts of the opener, such as the chain or belt, rollers, and hinges. This will reduce friction and wear, allowing the opener to function more efficiently. Be sure to use a lubricant specifically designed for garage doors to avoid any potential damage.
Testing the Safety Features
Modern garage door openers come equipped with various safety features, such as auto-reverse mechanisms and photoelectric sensors. These features are designed to prevent accidents and injuries by stopping the door from closing if an obstruction is detected. Regularly test these safety features to ensure they are functioning correctly. Place an object in the path of the door to see if it reverses upon contact. If the door does not reverse, it may be time to call a professional for a thorough inspection and repair.
Tightening Loose Hardware
Over time, the vibrations from the garage door opener can cause the hardware to loosen. Periodically check and tighten all the bolts, screws, and brackets that hold the opener in place. This will help maintain the stability and alignment of the opener, ensuring smooth operation.
Checking the Remote Controls and Keypads
The remote controls and keypads are essential components of your garage door opener system. Regularly check the batteries in your remote controls and replace them as needed. Ensure that the keypads are functioning correctly and that the codes are up to date. If you experience any issues with the remote controls or keypads, consult the user manual or contact a professional for assistance.
Cleaning the Opener
Dust and debris can accumulate on the garage door opener over time, potentially affecting its performance. Use a soft cloth to clean the exterior of the opener, removing any dirt or grime. Be sure to unplug the opener before cleaning to avoid any electrical hazards. Additionally, check the sensors and clean them with a soft cloth to ensure they are free from obstructions.
Professional Maintenance
While regular DIY maintenance is essential, it’s also a good idea to schedule professional maintenance for your garage door opener. A professional technician can perform a thorough inspection, identify any potential issues, and provide the necessary repairs or adjustments. This can help prevent major problems and extend the lifespan of your garage door opener.
Updating the Opener
If your garage door opener is outdated, it may be time to consider an upgrade. Modern garage door openers offer advanced features such as smartphone connectivity, battery backup, and enhanced security options. Upgrading to a newer model can improve the overall performance and convenience of your garage door system.
Troubleshooting Common Issues
Even with regular maintenance, you may encounter some common issues with your garage door opener. Here are a few troubleshooting tips:
- Door Not Opening or Closing: Check the power source and ensure the opener is plugged in. Verify that the remote controls and keypads are functioning correctly. If the problem persists, inspect the sensors and ensure they are aligned and free from obstructions.
- Noisy Operation: Lubricate the moving parts and tighten any loose hardware. If the noise continues, it may indicate a more serious issue that requires professional attention.
- Slow Operation: Check the settings on the opener and adjust the speed if possible. Lubricate the moving parts and ensure the door is balanced. If the problem persists, consult a professional for further inspection.
Conclusion
Maintaining your garage door opener is an essential part of overall garage door maintenance. Regular inspections, lubrication, and testing of safety features can help ensure that your opener operates smoothly and safely. Additionally, tightening loose hardware, checking remote controls and keypads, and cleaning the opener can prevent potential issues. For more complex problems or professional maintenance, consider reaching out to a trusted service provider. For more information on garage door maintenance and repair services, visit our service page or contact us directly. By following these tips, you can keep your garage door opener in top condition and enjoy reliable performance for years to come.
Addressing Unusual Noises
When it comes to maintaining your garage door, one of the most common issues homeowners encounter is unusual noises. These sounds can range from mild squeaks to loud bangs, and they often indicate that something is amiss with your garage door system. Addressing these noises promptly can prevent more serious problems down the line and ensure the longevity of your garage door. Here, we will explore the various types of unusual noises you might hear, their potential causes, and how to address them effectively.
Identifying the Types of Noises
Before diving into solutions, it’s essential to identify the type of noise your garage door is making. Different sounds can indicate different issues:
- Squeaking or Grinding: These noises often suggest that there is friction between metal parts, which could be due to a lack of lubrication.
- Banging or Popping: These sounds might indicate that the door is out of alignment or that there are issues with the springs.
- Rattling: This noise could be a sign that some parts are loose and need tightening.
- Humming: A humming sound usually comes from the motor and could indicate an electrical issue or a problem with the opener.
Common Causes and Solutions
Lack of Lubrication
One of the most common causes of squeaking or grinding noises is a lack of lubrication. Garage doors have many moving parts, including rollers, hinges, and tracks, that need to be well-lubricated to function smoothly. Over time, the lubrication can wear off, leading to increased friction and noise.
Solution: Regularly apply a high-quality silicone-based lubricant to all moving parts. Avoid using grease, as it can attract dirt and debris, which can exacerbate the problem.
Misaligned Tracks
If your garage door is making banging or popping noises, it could be due to misaligned tracks. When the tracks are not properly aligned, the door can struggle to move smoothly, causing loud noises.
Solution: Inspect the tracks for any visible signs of misalignment. If you notice any issues, you can try to realign them yourself by loosening the screws and gently tapping the tracks back into place. However, for more severe misalignments, it’s best to consult a professional. You can learn more about professional services on our service page.
Worn-Out Springs
Garage door springs are under a lot of tension and can wear out over time. Worn-out springs can cause a variety of noises, including banging and popping. If a spring breaks, it can be dangerous and should be addressed immediately.
Solution: Inspect the springs for any signs of wear or damage. If you suspect that the springs are the issue, it’s crucial to contact a professional for repair or replacement. Handling garage door springs can be hazardous, and it’s best left to experts. For more information, visit our garage door broken springs repair page.
Loose Hardware
Over time, the hardware that holds your garage door together can become loose. This can cause rattling noises as the door moves.
Solution: Periodically check all the nuts, bolts, and screws on your garage door and tighten any that are loose. This simple maintenance task can prevent a lot of noise and potential damage.
Motor Issues
If the noise is coming from the motor, it could be due to a variety of issues, including electrical problems or a malfunctioning opener.
Solution: First, check the power source to ensure that the motor is receiving adequate power. If the issue persists, you may need to consult a professional to diagnose and fix the problem. For more details, you can visit our electric garage door repairs page.
Preventative Maintenance Tips
To keep your garage door operating smoothly and quietly, regular maintenance is key. Here are some preventative tips:
- Regular Inspections: Conduct regular inspections of all the moving parts, including springs, cables, rollers, and tracks. Look for signs of wear and tear and address any issues promptly.
- Lubrication: As mentioned earlier, keep all moving parts well-lubricated. This will reduce friction and prevent many common noises.
- Balance Check: Periodically check the balance of your garage door. An unbalanced door can cause strain on the opener and other components, leading to noise and potential damage.
- Professional Tune-Ups: Consider scheduling regular tune-ups with a professional garage door technician. They can identify and address issues that you might miss during your inspections. For professional assistance, you can reach out to us through our contact us page.
When to Call a Professional
While many garage door noises can be addressed with simple maintenance, some issues require professional intervention. If you’re unsure about the cause of the noise or how to fix it, it’s always best to consult a professional. Attempting to fix certain issues, like broken springs, can be dangerous and may result in injury.
Professionals have the expertise and tools to diagnose and repair a wide range of garage door issues. They can also provide valuable advice on how to maintain your garage door to prevent future problems. For expert help, consider visiting our FAQ page for more information.
Conclusion
Unusual noises from your garage door are often a sign that something is wrong. By identifying the type of noise and its potential cause, you can take the necessary steps to address the issue. Regular maintenance, including lubrication and inspections, can prevent many common problems and keep your garage door operating smoothly. However, for more complex issues, it’s always best to consult a professional. By staying proactive and addressing unusual noises promptly, you can ensure the longevity and reliability of your garage door.
Seasonal Garage Door Maintenance Tips
Maintaining your garage door is crucial for ensuring its longevity and smooth operation. As the seasons change, different weather conditions can affect the performance and durability of your garage door. Here are some essential seasonal maintenance tips to keep your garage door in top shape throughout the year.
Spring Maintenance Tips
Spring is the perfect time to give your garage door a thorough inspection and tune-up. The moderate weather makes it easier to perform maintenance tasks without the extreme cold or heat. Here are some key steps to take:
- Inspect and Clean the Tracks: Over time, dirt and debris can accumulate in the tracks of your garage door, causing it to operate less smoothly. Use a damp cloth to wipe down the tracks and remove any buildup. Check for any signs of rust or damage and address them promptly.
- Lubricate Moving Parts: Proper lubrication is essential for the smooth operation of your garage door. Apply a high-quality lubricant to the rollers, hinges, and springs. This will reduce friction and prevent wear and tear.
- Check the Balance: A well-balanced garage door is crucial for its proper functioning. Disconnect the opener and manually lift the door halfway. If it stays in place, it’s balanced. If it falls or rises, you may need to adjust the springs. For professional assistance, consider our garage door spring repair service in Weston.
- Test the Auto-Reverse Feature: The auto-reverse feature is a critical safety component of your garage door. Place an object, such as a broom, in the door’s path and close it. If the door doesn’t reverse upon contact, you may need to adjust the settings or consult a professional.
Summer Maintenance Tips
Summer heat can take a toll on your garage door, especially if it’s exposed to direct sunlight. Here are some tips to keep your garage door functioning optimally during the hot months:
- Inspect the Weather Stripping: The weather stripping around your garage door helps keep out dust, pests, and extreme temperatures. Check for any cracks or damage and replace it if necessary. This will also improve your home’s energy efficiency.
- Check for Warping: High temperatures can cause wooden garage doors to warp. Inspect your door for any signs of warping or bending. If you notice any issues, consider consulting our garage door repair service in Davie for professional advice.
- Clean and Paint: Summer is an excellent time to clean and repaint your garage door. This not only enhances its appearance but also provides a protective layer against the elements. Use a mild detergent to clean the door and apply a weather-resistant paint.
- Inspect the Cables: The cables are an essential component of your garage door system. Check for any signs of fraying or wear. If you notice any issues, it’s best to consult a professional for repairs.
Fall Maintenance Tips
As the weather cools down, it’s essential to prepare your garage door for the upcoming winter months. Here are some fall maintenance tips:
- Inspect the Rollers: Rollers can wear out over time, causing your garage door to operate less smoothly. Inspect the rollers for any signs of wear and replace them if necessary. Nylon rollers are a durable and quiet option.
- Lubricate the Moving Parts: Just like in spring, fall is a good time to lubricate the moving parts of your garage door. This will ensure smooth operation and prevent any issues during the colder months.
- Check the Insulation: Proper insulation is crucial for maintaining a comfortable temperature in your garage. Inspect the insulation on your garage door and replace any damaged sections. This will also help reduce energy costs.
- Test the Door’s Balance: As the weather changes, the balance of your garage door can be affected. Perform the balance test again and make any necessary adjustments. For professional assistance, consider our garage door spring repair service in Sunrise.
Winter Maintenance Tips
Winter can be particularly harsh on your garage door, with cold temperatures and moisture causing various issues. Here are some tips to keep your garage door in top condition during the winter months:
- Inspect the Weather Stripping: Cold air can seep into your garage if the weather stripping is damaged. Check for any cracks or gaps and replace the weather stripping if necessary. This will help keep your garage warm and reduce energy costs.
- Lubricate the Moving Parts: Cold temperatures can cause the moving parts of your garage door to become stiff. Apply a high-quality lubricant to the rollers, hinges, and springs to ensure smooth operation.
- Check the Tracks: Snow and ice can accumulate in the tracks of your garage door, causing it to operate less smoothly. Clear any debris and ensure the tracks are free of obstructions.
- Inspect the Springs: Cold temperatures can cause the springs to become brittle and break. Inspect the springs for any signs of wear or damage. If you notice any issues, consider consulting our garage door spring repair service in Pembroke Pines for professional assistance.
- Test the Auto-Reverse Feature: The auto-reverse feature is especially important during the winter months when ice and snow can obstruct the door’s path. Test the feature regularly to ensure it is functioning correctly.
Year-Round Maintenance Tips
In addition to seasonal maintenance, there are some tasks you should perform year-round to keep your garage door in optimal condition:
- Regular Inspections: Perform regular inspections of your garage door and its components. Look for any signs of wear, damage, or misalignment. Address any issues promptly to prevent further damage.
- Keep the Door Clean: Regularly clean your garage door to remove dirt, dust, and debris. This will help maintain its appearance and prevent any buildup that could affect its operation.
- Check the Opener: The garage door opener is a crucial component of your garage door system. Test the opener regularly to ensure it is functioning correctly. Replace the batteries in the remote control as needed.
- Professional Maintenance: Consider scheduling regular professional maintenance for your garage door. A professional technician can perform a thorough inspection, identify any potential issues, and make necessary repairs. For more information, visit our service page.
By following these seasonal maintenance tips, you can ensure your garage door remains in excellent condition throughout the year. Regular maintenance not only extends the life of your garage door but also enhances its performance and safety. For more information on garage door maintenance and repair services, visit our blog or contact us today.
DIY vs. Professional Garage Door Maintenance
When it comes to maintaining your garage door, homeowners often face the dilemma of choosing between DIY methods and professional services. Both approaches have their pros and cons, and understanding these can help you make an informed decision that best suits your needs and budget. In this comprehensive guide, we will explore the differences between DIY and professional garage door maintenance, helping you determine which option is right for you.
DIY Garage Door Maintenance
Pros of DIY Maintenance
- Cost-Effective: One of the most significant advantages of DIY garage door maintenance is the cost savings. By handling minor repairs and regular upkeep yourself, you can avoid the labor costs associated with hiring a professional. This can be particularly beneficial for homeowners on a tight budget.
- Convenience: Performing maintenance tasks on your own schedule can be more convenient than waiting for a professional to become available. You can address minor issues immediately, preventing them from escalating into more significant problems.
- Learning Experience: DIY maintenance provides an opportunity to learn more about your garage door system. Understanding how your garage door works can help you identify potential issues early and make more informed decisions about repairs and replacements.
Cons of DIY Maintenance
- Limited Expertise: While DIY maintenance can be effective for minor tasks, it may not be suitable for more complex issues. Without the proper training and experience, you may struggle to diagnose and fix certain problems, potentially causing more harm than good.
- Safety Risks: Garage doors are heavy and operate under high tension, making them potentially dangerous to work on. Without the proper tools and knowledge, you risk injury when attempting DIY repairs. For example, handling garage door springs can be particularly hazardous.
- Time-Consuming: DIY maintenance can be time-consuming, especially if you are unfamiliar with the tasks involved. What might take a professional a few minutes could take you hours, cutting into your valuable free time.
Professional Garage Door Maintenance
Pros of Professional Maintenance
- Expertise and Experience: Professional technicians have the training and experience to handle a wide range of garage door issues. They can quickly diagnose problems and provide effective solutions, ensuring your garage door operates smoothly and safely.
- Safety: Hiring a professional reduces the risk of injury associated with garage door maintenance. Technicians have the necessary tools and knowledge to perform repairs safely, minimizing the risk of accidents.
- Comprehensive Service: Professionals can provide a thorough inspection of your garage door system, identifying potential issues that you might overlook. They can also perform preventive maintenance, extending the lifespan of your garage door and reducing the likelihood of future problems.
- Warranty Protection: Many professional services offer warranties on their work, providing peace of mind that any issues will be addressed promptly and at no additional cost. This can be particularly valuable for major repairs or installations.
Cons of Professional Maintenance
- Cost: The primary drawback of professional maintenance is the cost. Hiring a technician can be expensive, particularly for extensive repairs or replacements. However, the investment can be worthwhile if it prevents more costly issues down the line.
- Scheduling: Coordinating with a professional service can sometimes be inconvenient, particularly if you have a busy schedule. You may need to wait for an available appointment, which can delay necessary repairs.
Making the Right Choice
When deciding between DIY and professional garage door maintenance, consider the following factors:
- Complexity of the Issue: For minor tasks such as lubricating moving parts or tightening loose hardware, DIY maintenance can be effective. However, for more complex issues such as broken springs or malfunctioning openers, it is best to hire a professional. For example, if you need broken spring repair, a professional service is recommended.
- Safety Concerns: If a maintenance task involves significant safety risks, such as adjusting garage door springs, it is best to leave it to the professionals. The potential for injury is high, and the cost of medical bills can far outweigh the savings from DIY repairs.
- Budget: Consider your budget when deciding between DIY and professional maintenance. While DIY can save money upfront, professional services can provide long-term savings by preventing major issues and extending the lifespan of your garage door.
- Time and Convenience: If you have the time and enjoy hands-on projects, DIY maintenance can be a rewarding experience. However, if you prefer to spend your time on other activities, hiring a professional can save you time and hassle.
Conclusion
Both DIY and professional garage door maintenance have their advantages and disadvantages. By carefully considering the complexity of the issue, safety concerns, budget, and your personal preferences, you can make an informed decision that best suits your needs. For homeowners who prefer the peace of mind that comes with professional service, companies like Garage Door Installation and Repairs in Plantation offer comprehensive maintenance and repair services. Whether you choose to tackle maintenance tasks yourself or hire a professional, regular upkeep is essential to ensure the longevity and reliability of your garage door system.
For more information on garage door maintenance and repair services, visit our FAQ page or contact us directly.
Common Garage Door Problems and Solutions
Maintaining your garage door is crucial for the safety, security, and convenience of your home. However, even with regular maintenance, garage doors can encounter various issues. Understanding these common problems and their solutions can help you address them promptly and efficiently, ensuring your garage door remains in optimal condition.
Garage Door Won’t Open or Close
One of the most common issues homeowners face is a garage door that won’t open or close. This problem can be caused by several factors:
- Remote Control Issues: If your garage door isn’t responding to the remote control, the first step is to check the batteries. Replace them if necessary. If the problem persists, ensure that the remote is programmed correctly and within range of the garage door opener.
- Blocked Sensors: Modern garage doors are equipped with safety sensors that prevent the door from closing if an object is detected in its path. Check for any obstructions near the sensors and clean the lenses to ensure they are not dirty or misaligned.
- Broken Springs: Garage door springs bear the weight of the door and help it move smoothly. If a spring is broken, the door may not open or close properly. This is a serious issue that requires professional attention. For more information on spring repair services, visit our page on garage door spring repair service in Weston.
Noisy Garage Door
A noisy garage door can be both annoying and indicative of underlying issues. Common causes of a noisy garage door include:
- Loose Hardware: Over time, the nuts, bolts, and screws on your garage door can become loose. Tighten all hardware to reduce noise and ensure the door operates smoothly.
- Worn Rollers: Rollers that are worn out or damaged can cause the door to make grinding or squeaking noises. Inspect the rollers and replace them if necessary.
- Lack of Lubrication: Regular lubrication of the moving parts, such as hinges, springs, and rollers, can significantly reduce noise. Use a high-quality garage door lubricant to keep these components functioning smoothly.
Garage Door Opens Unevenly
If your garage door opens unevenly or appears to be crooked, it could be due to:
- Imbalanced Springs: Springs that are not balanced correctly can cause the door to open unevenly. This issue requires professional adjustment to ensure the springs are properly tensioned.
- Track Misalignment: The tracks on either side of the door must be aligned correctly for smooth operation. Check for any bends or gaps in the tracks and adjust them as needed.
- Worn Cables: The cables that lift the door can wear out over time, leading to uneven opening. Inspect the cables for fraying or damage and replace them if necessary.
Garage Door Closes Too Quickly
A garage door that closes too quickly can be dangerous and may indicate a problem with the springs or cables:
- Broken Springs: As mentioned earlier, broken springs can cause the door to close rapidly. This issue should be addressed by a professional to avoid injury.
- Damaged Cables: Cables that are frayed or broken can also cause the door to close too quickly. Inspect the cables and replace them if needed.
- Incorrect Limit Settings: The limit settings on your garage door opener control how far the door travels when opening and closing. If these settings are incorrect, the door may close too quickly. Refer to your opener’s manual to adjust the limit settings properly.
Garage Door Reverses Before Closing
If your garage door starts to close but then reverses, it could be due to:
- Sensor Issues: As mentioned earlier, blocked or misaligned sensors can cause the door to reverse. Ensure the sensors are clean and properly aligned.
- Obstructions: Check for any objects or debris in the door’s path that could trigger the safety sensors.
- Limit Settings: Incorrect limit settings can also cause the door to reverse. Adjust the settings according to the manufacturer’s instructions.
Remote Control or Keypad Not Working
If your remote control or keypad is not working, consider the following solutions:
- Battery Replacement: Replace the batteries in the remote control or keypad.
- Reprogramming: Reprogram the remote control or keypad according to the manufacturer’s instructions.
- Interference: Ensure there are no electronic devices nearby that could be causing interference with the signal.
Garage Door Sticks or Jams
A garage door that sticks or jams can be frustrating and may indicate:
- Dirty Tracks: Dirt and debris can accumulate in the tracks, causing the door to stick. Clean the tracks regularly to ensure smooth operation.
- Damaged Tracks: Inspect the tracks for any bends or damage and repair or replace them as needed.
- Worn Rollers: Worn or damaged rollers can also cause the door to stick. Replace the rollers if necessary.
Conclusion
Regular maintenance and prompt attention to common garage door problems can help you avoid costly repairs and ensure your garage door operates smoothly. For professional assistance with any garage door issues, consider reaching out to our experts. Learn more about our services on our service page or contact us directly through our contact page. By staying proactive and addressing issues as they arise, you can keep your garage door in top condition for years to come.
Creating a Garage Door Maintenance Schedule
Creating a comprehensive garage door maintenance schedule is essential for ensuring the longevity and optimal performance of your garage door. Regular maintenance not only helps in preventing unexpected breakdowns but also enhances the safety and security of your home. Here’s a detailed guide on how to create an effective garage door maintenance schedule.
Monthly Inspections
Visual Inspection: Start by visually inspecting your garage door and its components. Look for any signs of wear and tear, rust, or damage. Pay close attention to the springs, cables, rollers, and pulleys. If you notice any issues, it’s crucial to address them immediately to prevent further damage.
Operational Test: Open and close the garage door a few times to ensure it operates smoothly. Listen for any unusual noises such as grinding or scraping, which could indicate a problem. The door should move up and down without any jerking or hesitation.
Safety Features Check: Test the safety features of your garage door, including the auto-reverse mechanism and photo-eye sensors. Place an object, such as a roll of paper towels, in the door’s path to see if it reverses upon contact. Clean the photo-eye sensors with a soft cloth to remove any dirt or debris that might obstruct their function.
Quarterly Maintenance
Lubrication: Lubricate all moving parts, including the rollers, hinges, tracks, and springs, with a high-quality garage door lubricant. This helps in reducing friction and wear, ensuring smooth operation. Avoid using heavy grease as it can attract dirt and grime.
Balance Test: Disconnect the garage door opener by pulling the release handle. Manually lift the door halfway and let go. If the door stays in place, it is properly balanced. If it moves up or down, the springs may need adjustment. Balancing the door is crucial for preventing undue strain on the opener.
Tighten Hardware: Over time, the hardware on your garage door can become loose due to regular use. Use a socket wrench to tighten any loose bolts and screws on the brackets, hinges, and tracks. This helps in maintaining the structural integrity of the door.
Biannual Tasks
Weatherstripping Inspection: Check the weatherstripping along the bottom of the door and around the frame. Replace any damaged or worn weatherstripping to ensure a proper seal. This helps in keeping out drafts, moisture, and pests, and also improves energy efficiency.
Track Cleaning: Clean the tracks on both sides of the door to remove any dirt, debris, or obstructions. Use a damp cloth to wipe them down and ensure they are free of any buildup that could hinder the door’s movement.
Professional Inspection: Schedule a professional inspection at least twice a year. A trained technician can identify and address issues that you might overlook. They can also perform more complex tasks such as adjusting the spring tension and checking the opener’s motor.
Annual Maintenance
Spring Inspection: The springs are one of the most critical components of your garage door. Inspect them for any signs of wear, rust, or damage. If you notice any issues, it’s best to contact a professional for garage door spring repair service to avoid potential hazards.
Cable Inspection: Check the cables for any fraying or wear. These cables are under high tension and can cause serious injury if they snap. If you notice any damage, have them replaced by a professional.
Opener Maintenance: Inspect the garage door opener, including the motor, gears, and chain or belt drive. Clean any dirt or debris and lubricate the moving parts. Replace the batteries in the remote controls and keypad to ensure they are functioning properly.
Additional Tips
Keep It Clean: Regularly clean the exterior of your garage door to remove dirt, grime, and any corrosive substances. Use a mild detergent and water, and avoid using harsh chemicals that could damage the door’s finish.
Monitor Weather Conditions: Extreme weather conditions can affect the performance of your garage door. During winter, ensure that the door and its components are free of ice and snow. In humid conditions, check for any signs of rust or corrosion and address them promptly.
Stay Informed: Stay updated with the latest garage door maintenance tips and best practices by following reliable sources. Visit our blog for more information and expert advice.
Conclusion
Creating a garage door maintenance schedule is a proactive approach to ensuring the longevity and reliability of your garage door. By performing regular inspections, lubrication, and professional check-ups, you can prevent costly repairs and enhance the safety of your home. For any complex issues or professional assistance, don’t hesitate to contact us. Our team of experts is always ready to help you with all your garage door maintenance needs.
Conclusion:
Maintaining your garage door is an essential aspect of homeownership that often goes overlooked. By incorporating regular inspections, lubrication, and timely repairs into your routine, you can extend the lifespan of your garage door, enhance its performance, and ensure the safety of your household. Remember, a well-maintained garage door not only adds to the curb appeal of your home but also provides peace of mind knowing that it operates smoothly and reliably. Whether you choose to tackle these tasks yourself or enlist the help of a professional, the key is consistency and attention to detail. With these garage door maintenance tips in mind, you can keep your garage door in top shape for years to come. Happy maintaining!


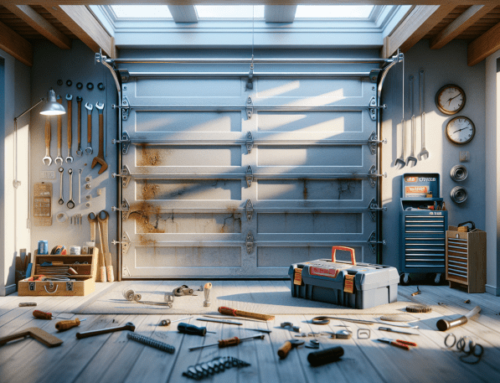

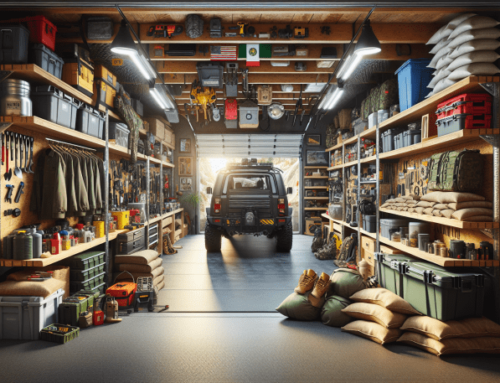
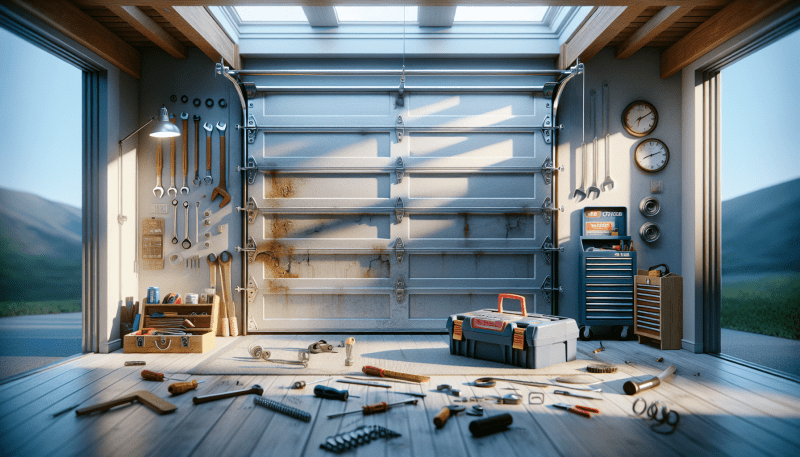
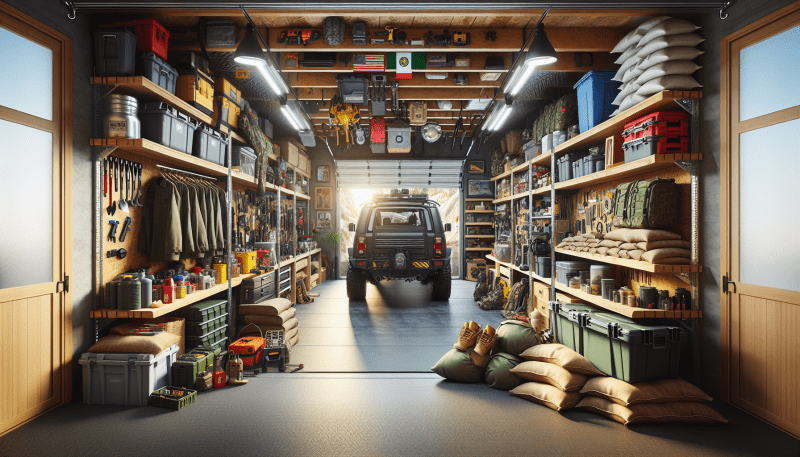