A garage door remote should make coming and going effortless. Press the button from the driveway, wait a moment, and the door opens or closes automatically. But when the garage door remote not working problem appears, convenience can quickly turn into frustration—especially when you are in a hurry, trapped outside, or unsure whether the door is responding safely.
The good news is that many remote-control problems are simple to diagnose and fix. A weak battery, a locked wall console, an obstructed antenna, or a remote that has lost its programming can often be addressed in just a few minutes. Other issues, such as damaged wiring, a failed logic board, or a faulty opener motor, require more caution and may need professional service.
This guide explains the most common reasons a garage door remote stops working, how to troubleshoot each possibility safely, and when it is time to stop testing and call a garage door technician. The steps apply to many common garage door opener brands, although button names and programming procedures may vary by model.
According to consumer safety guidance from the U.S. Consumer Product Safety Commission, garage door openers should be tested regularly, and the reversing mechanism should respond when the door encounters an obstruction.
That safety reminder is important because a remote problem is not always limited to the handheld transmitter. The opener itself, the photo-eye sensors, the wall control, the power supply, and the door hardware all work together. If any part of that system is malfunctioning, repeatedly pressing the remote may not solve the problem and could hide a more serious safety concern.
Begin with the easiest checks. Stand close to the garage door and press the remote button once. Avoid holding the button down repeatedly. Observe what happens. Does the opener light flash? Does the motor make a clicking or humming sound? Does the door move a few inches and stop? Does nothing happen at all? These details can help identify whether the issue is the remote, the opener, the door, or the safety system.
If the wall-mounted control opens the door but the handheld remote does not, the opener has power and the problem is probably related to the remote, its battery, its programming, or radio interference. If neither the remote nor the wall control works, investigate the power supply, opener controls, sensors, and motor. If the opener runs but the door does not move, the problem may involve the trolley, emergency-release mechanism, springs, tracks, or other mechanical components.
The first and most common cause is a depleted remote battery. Garage door remotes typically use small coin-cell batteries or compact alkaline batteries. Even if the indicator light on the remote still illuminates, the battery may not have enough strength to transmit a reliable signal over the distance between the remote and opener.
Replace the battery with the exact type listed inside the remote or in the owner’s manual. Check the positive and negative markings before installing it. Make sure the battery contacts are clean and firmly touching the battery. A remote that has been stored in a hot vehicle, dropped, exposed to moisture, or left unused for a long period may also have corrosion or internal damage.
- Open the remote carefully using the small seam or screw provided by the manufacturer.
- Remove the old battery without bending the contacts.
- Inspect the battery compartment for white, green, or dark corrosion.
- Install a new battery in the correct direction.
- Close the case securely and test the remote from several distances.
If the remote works only when you are standing directly beneath the opener, the battery may still be weak, the antenna may be obstructed, or the remote may be damaged. A healthy remote should generally operate from a reasonable distance, although range depends on the opener design, building materials, interference, and the condition of the antenna.
Next, check whether the remote is locked out by the wall-mounted control panel. Many modern garage door openers have a vacation lock, lock mode, or security button. When enabled, this feature prevents wireless remotes from operating the door while still allowing the wall console to work. It is useful when you are away from home, but it can be confusing if it is activated accidentally.
Look for a button labeled “Lock,” “Vacation,” or a padlock symbol on the wall console. The procedure to disable it varies. On some systems, you must press and hold the lock button for a few seconds. On others, the lock indicator disappears after a short button combination. Use the opener’s manual when possible rather than guessing, because button layouts differ between models.
After turning off lock mode, wait several seconds and test the remote again. If multiple remotes stopped working at the same time, a locked wall console is more likely than simultaneous battery failure. This is also a useful clue if visitors or family members recently changed settings on the wall control.
Another simple cause is distance or interference. Wireless garage door signals can be weakened by thick walls, metal siding, parked vehicles, storage items, LED bulbs, security systems, wireless devices, and nearby radio equipment. Try the remote from directly inside the garage. If it works there but not from the driveway, signal range or interference may be involved.
Remove recently installed electronic devices from the area temporarily. Certain inexpensive LED bulbs have been known to create radio-frequency interference with some garage door opener systems. If the remote begins working when a bulb is removed, replace it with an opener-compatible LED bulb or a conventional bulb approved by the manufacturer.
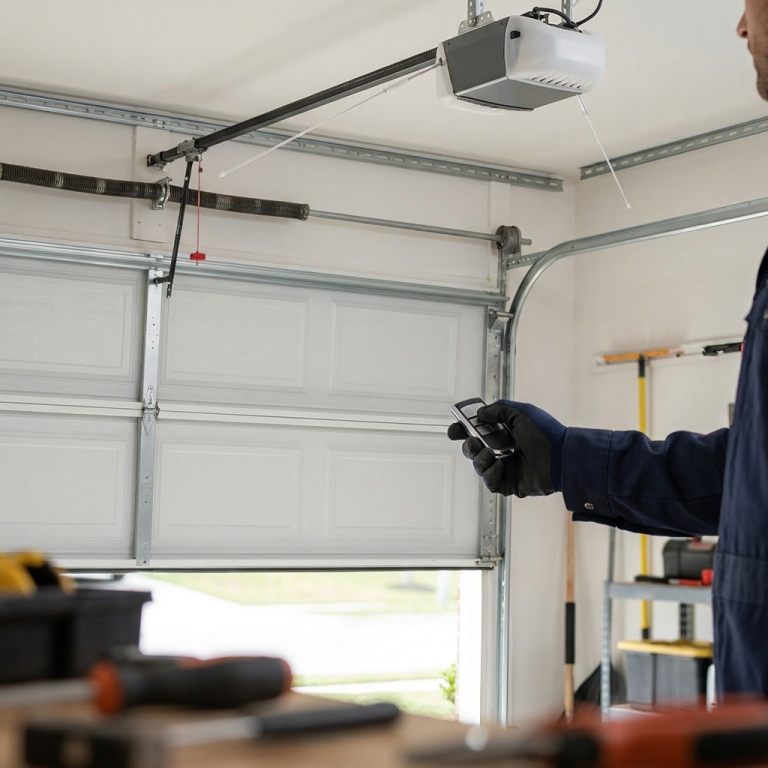
Inspect the opener’s antenna as well. Many units have a short wire hanging near the motor housing. It should be extended downward rather than tucked inside the opener cover or wrapped around a metal bracket. Do not cut, splice, or alter the antenna. If it is broken, loose, or missing, a qualified technician can inspect and replace it.
When a garage door remote not working situation affects only one remote, the transmitter itself may be defective or may have lost its stored code. Try another programmed remote, if available. If the second remote opens the door, the opener is probably functioning and the first remote needs a new battery, reprogramming, or replacement.
If none of the remotes work, check the opener’s power source. A garage door opener may be plugged into an outlet that is controlled by a wall switch, protected by a tripped circuit breaker, or connected to a ground-fault circuit interrupter that has reset. Look at the opener’s lights and listen for signs of power.
Do not assume that a dark opener always means the motor has failed. Check whether the garage lights, nearby outlets, or wall console are working. If safe to do so, verify that the opener’s plug is fully inserted into the outlet. Avoid using an extension cord as a permanent solution, and never work inside the opener’s electrical housing unless you are trained to do so.
- Check the opener’s power cord and outlet.
- Look at the home’s electrical panel for a tripped breaker.
- Reset a nearby GFCI outlet only if it is accessible and safe to operate.
- Test the wall-mounted control panel.
- Check whether the opener light or status indicator turns on.
If the circuit trips again immediately, stop resetting it. Repeated tripping can indicate a short circuit, damaged wiring, water intrusion, or a failing opener. Electrical troubleshooting beyond basic checks should be performed by a qualified professional.
Photo-eye safety sensors are another frequent source of garage door trouble. These small devices are usually mounted on opposite sides of the garage door opening, a few inches above the floor. One sensor sends an invisible beam to the other. If the beam is interrupted, misaligned, dirty, or blocked, the opener may refuse to close the door or may reverse it after beginning to close.
Although sensor problems often affect closing rather than opening, they can make homeowners believe that a remote is malfunctioning. Clean both sensor lenses with a soft, dry cloth. Check for dust, spider webs, leaves, stored boxes, toys, or other objects crossing the doorway. Confirm that both sensors are firmly attached and pointing directly at each other.
Many sensor systems have small indicator lights. A steady light on both sides generally suggests alignment, while a flickering or absent light may indicate an obstruction, loose wire, or alignment issue. Do not rely on color alone because different manufacturers use different indicators.
Never bypass, tape over, disconnect, or permanently reposition the safety sensors to force the door to operate. These devices are designed to reduce the risk of injury or property damage. If a sensor wire is broken or the lights remain abnormal after cleaning and alignment, have the system inspected.
The reversing system is a critical safety feature, not a convenience feature. A garage door should not be operated if it fails to reverse correctly during a proper safety test.
To test the reverse function, place a suitable object recommended by the manufacturer beneath the closing path and activate the door from a safe position. The door should reverse when it contacts the object. Consult the owner’s manual for the correct test method and object dimensions. Keep people and pets away from the opening, and stop immediately if the door does not behave as expected.
A remote can also stop working because it has lost its programming. This can happen after a power interruption, replacement of the opener’s logic board, accidental button activation, or the purchase of a new remote. Programming usually involves pressing the “Learn,” “Program,” or “Smart” button on the opener and then pressing the remote button within a specific time window.
Before programming, locate the opener’s model number. It may be printed on the motor housing, under a light cover, on the side panel, or in the original documentation. The correct process depends on the brand and model. Some openers use colored learn buttons, while others use a menu on a wall console or smart control panel.
- Find the opener’s programming or learn button.
- Press it briefly according to the owner’s manual.
- Press and hold the desired remote button when the indicator allows it.
- Wait for the opener light or indicator to confirm the code.
- Test the remote from outside the garage.
Do not hold the learn button longer than instructed. On some openers, holding it down for several seconds erases every stored remote and keypad code. If that happens, all authorized devices will need to be programmed again. For security, make sure lost or stolen remotes are removed from the opener’s memory.
If you recently moved into a home, it is wise to clear the opener’s old remote codes and program only the remotes and keypads you currently use. This prevents former residents, contractors, or previous occupants from retaining access. Follow the manufacturer’s instructions carefully, and keep the manual in a safe place for future reference.
Older remotes and openers may use fixed-code technology, while newer systems often use rolling-code security. Rolling-code systems change the access code each time the remote is used, making unauthorized duplication more difficult. A replacement remote must be compatible with the opener’s security technology. Buying a visually similar remote is not enough; confirm compatibility by model number or manufacturer specifications.
Universal remotes can be convenient, but they are not universally compatible with every opener. Some require a separate compatibility bridge, while others work only with specific brands and production years. If a universal remote fails to program, verify the compatibility list before assuming the opener is defective.
Physical damage is another reason a garage door remote not working problem may continue after replacing the battery. Look for cracked plastic, broken buttons, a loose battery cover, liquid damage, or a remote that rattles when moved. A button may be stuck internally, causing the transmitter to send continuously or preventing other buttons from making contact.
Press each button gently and compare how it feels. If one is noticeably soft, stuck, or difficult to press, the remote may need replacement. Avoid spraying household cleaners or lubricants into the remote. Liquids can damage the circuit board and leave residue that interferes with the buttons.
For a damaged remote, replacement is usually safer and more practical than attempting a circuit-board repair. Keep the old remote away from children until it is deactivated or discarded. If it is lost, erase its code from the opener when possible and reprogram the remaining devices.
The remote may be working correctly even if the door does not respond because the door is mechanically locked. Check whether the manual slide lock or exterior keyed lock is engaged. Some older garages have a manual lock that can prevent the opener from moving the door. Attempting to operate the opener against an engaged lock can damage the door or opener.
Disengage a manual lock only according to the hardware instructions. If the door has been locked from the outside and you do not have access, do not force the door or pry it open. A locksmith or garage door professional can provide safe entry and inspect the lock.
The emergency release may also be disconnected. This mechanism allows the door to be operated manually during a power outage. If the release cord was pulled, the trolley may no longer be connected to the opener carriage. In that situation, the motor may run and the remote may be transmitting properly, but the door will not move.
With the door fully closed, follow the owner’s manual to reconnect the trolley. Never pull the emergency release while the door is open unless a qualified person has secured the door. A disconnected or unbalanced door can fall unexpectedly, creating a serious injury hazard.
Observe the door’s movement when using the wall control. If the motor runs but the chain, belt, or screw drive does not move, the internal drive system may be damaged. If the drive moves but the door stays in place, the trolley, arm, or connection hardware may be broken. If the door begins moving and then stops, binding, worn springs, damaged tracks, or incorrect force settings may be involved.
Garage doors are heavy systems supported by high-tension springs and cables. Do not adjust torsion springs, extension springs, drums, cables, or force limits unless you have the training and proper tools. A spring can release enough energy to cause severe injury. Remote troubleshooting should remain limited to safe, external checks.
An unbalanced door can create symptoms that look like an opener or remote failure. With the opener disconnected and the door closed, a trained adult may be able to lift the door manually to assess whether it moves smoothly. However, if the door feels unusually heavy, falls, binds, or will not stay partially open, stop testing and call a professional.
Weather can affect both remotes and garage doors. Cold temperatures may reduce battery performance, while humidity can cause corrosion. Ice, snow, and hardened grease can make the door stick to the floor or bind in the tracks. Strong sunlight or glare usually does not stop the remote signal, but it can sometimes make sensor indicators harder to see.
Inspect the bottom seal and the floor for ice or debris. Do not use the opener to force a frozen door open. Clear the obstruction carefully, allow ice to melt naturally when possible, and inspect the door before operating it again. If the door remains stuck, professional assistance is safer than repeatedly pressing the remote.
Metal structures and building materials can affect signal range. If the garage has recently been insulated, fitted with metal shelving, or remodeled, the remote’s performance may change. Do not mount the opener antenna inside a metal enclosure or place the remote beside a large metal object while testing.
Smartphone applications and wireless keypads introduce additional troubleshooting steps. If the wall control and handheld remote work but the app does not, the issue may involve Wi-Fi, the home router, the opener’s internet connection, or the service provider. If the app works but the handheld remote fails, focus on the remote and radio receiver.
Restarting the router may restore a smart opener connection, but it will not repair a damaged remote. Check the app for error messages and confirm that the account still has permission to control the opener. If ownership or account settings changed, the device may need to be invited or paired again.
Some modern openers include battery backup systems. During a power outage, the opener may continue to respond to remotes, but its operation may be slower or limited. A backup battery that is old or discharged may cause warning beeps, flashing indicators, or inconsistent performance. Replace it only with the approved battery type and follow the manufacturer’s safety directions.
Do not confuse the opener’s backup battery with the small battery inside the handheld remote. They are separate components with different functions. Replacing one will not automatically fix the other.
When troubleshooting, keep a written record of what you observe. Note whether the remote light turns on, whether another remote works, whether the wall console functions, whether the opener lights flash, and whether the door moves manually. This information can save time when speaking with a technician and may prevent unnecessary part replacements.
A useful diagnostic sequence is to test the wall console first, then test a second remote if available, replace the remote battery, check lock mode, inspect power, clean and align the photo-eye sensors, and finally reprogram the remote. This order begins with low-risk, inexpensive checks and avoids unnecessary adjustments to sensitive components.
- Stand close to the opener and press the remote once.
- Check whether the remote indicator light activates.
- Replace the remote battery with the correct type.
- Confirm that the wall console is not in lock or vacation mode.
- Test the wall console and any second remote.
- Check the opener’s plug, breaker, and visible power indicators.
- Clean and align the safety sensors.
- Inspect the antenna for visible damage or obstruction.
- Verify that the manual lock is disengaged and the trolley is connected.
- Reprogram the remote using the model-specific instructions.
Stop troubleshooting and arrange professional service if the opener makes grinding, popping, or burning sounds; if smoke or a burning smell is present; if the door is crooked; if cables are loose; if springs are broken; if the door falls or feels unusually heavy; or if the circuit breaker repeatedly trips. These symptoms can indicate mechanical or electrical hazards that are not appropriate for do-it-yourself repair.
Professional help is also recommended when the remote works intermittently for no clear reason, the operating range is extremely short after installing a fresh battery, the opener shows repeated diagnostic error codes, or a new compatible remote will not program. A technician can test the receiver, logic board, antenna, wiring, motor, and safety circuits with specialized equipment.
Before scheduling service, collect the opener brand and model number, the approximate age of the system, the symptoms you observed, and the steps you already tried. Tell the technician whether the door works from the wall control, whether the lights flash, and whether the issue affects one remote or every remote. Clear information can make diagnosis faster and reduce the likelihood of replacing a part that is still functional.
Choosing between repair and replacement depends on the age, condition, and features of the opener. A simple battery, remote, sensor, or programming issue is usually worth repairing. An older opener with repeated receiver problems, worn mechanical parts, excessive noise, outdated safety features, or no battery-backup compatibility may be a better candidate for replacement.
Newer garage door openers often provide quieter operation, improved security, smartphone connectivity, automatic closing features, battery backup, and enhanced diagnostic indicators. However, replacement should be based on the entire system’s condition—not solely on one remote problem. If the opener is otherwise reliable, replacing the remote or receiver may be sufficient.
Security should remain a priority after fixing the remote. Do not leave a programmed remote in an unlocked vehicle parked outside. Use a keychain remote or a smart system with access controls when appropriate. If a remote is lost, remove its code from the opener’s memory as soon as possible. Change keypad codes periodically and avoid sharing them casually.
Teach household members how to use the emergency release, wall console, and manual locks safely. Children should not play with the remote or stand beneath a moving door. Keep the operating area clear of bicycles, toys, tools, vehicles, and pets. A remote should be treated as a control for a heavy moving machine, not as a harmless household gadget.
Regular maintenance can reduce future remote-related confusion. Test the remote from its normal distance every few months. Replace batteries when range decreases rather than waiting for complete failure. Keep the photo-eye lenses clean. Inspect the door visually for damaged rollers, loose hardware, frayed cables, or uneven movement. Listen for changes in sound, because new grinding or straining can signal a mechanical problem.
Lubricate only the parts identified by the manufacturer, and use a garage-door-approved lubricant. Do not lubricate photo-eye sensors, belts, electrical components, or the remote itself. Avoid adjusting spring tension or opener force settings as a routine maintenance task. Incorrect adjustments can compromise the door’s balance and reversing performance.
It is also helpful to keep a current manual and record the remote model. If the original documentation is missing, many manufacturers provide manuals online. Use the exact opener model rather than relying on a general brand guide. Similar-looking openers can have different programming steps and safety procedures.
When searching online for solutions to a garage door remote not working issue, be cautious with advice that recommends bypassing safety sensors, shorting terminals, modifying wiring, or increasing opener force. Such actions may make the door move temporarily but can create serious risks. Reliable troubleshooting starts with batteries, power, settings, alignment, programming, and visible conditions before moving to technical diagnosis.
A remote that works only after several presses may be warning you about a developing problem. It could be a weak battery, worn button contacts, interference, a failing receiver, or a signal that is being blocked. Do not wait until the remote stops completely if the performance is becoming unreliable. Replacing a low-cost battery or remote early is easier than discovering the issue when you are locked out during bad weather.
If the door opens but does not close from the remote, focus first on the safety sensors and the door’s closing path. If the door closes but will not open, check for mechanical binding, a locked door, or an opener setting issue. If the remote and wall button both fail in the same way, investigate the opener rather than replacing every remote.
If the remote’s light comes on but there is no response, remember that the light only confirms that the remote has some electrical power. It does not prove that the transmitter is sending the correct signal or that the opener’s receiver is functioning. A second compatible remote is one of the simplest ways to separate a transmitter problem from an opener problem.
If the wall control works but all remotes fail after a storm, inspect for power surges, water damage, and receiver problems. Unplugging the opener for a short period may reset some systems, but follow the manufacturer’s instructions and do not use a reset as a substitute for inspection. Surge protection designed for garage door openers may help reduce electrical damage in areas prone to storms.
If you are locked outside, use an authorized alternative entry method rather than forcing the door. A coded exterior keypad, a second remote, a smart-home application, or another household member may provide access. If none is available, contact a qualified garage door service provider or locksmith. Do not attempt to bend the top section, pry the door, or manipulate the emergency-release mechanism from outside.
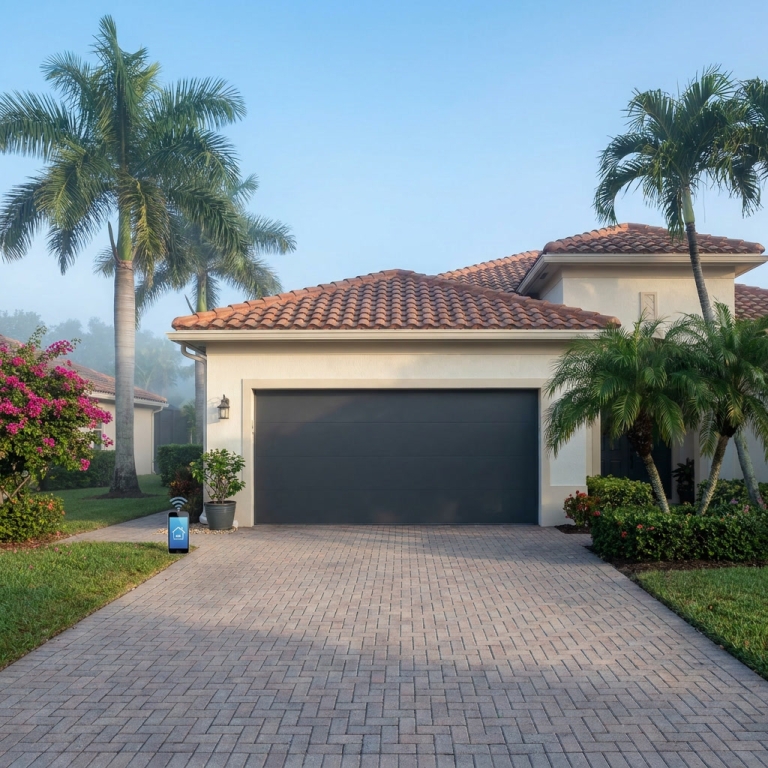
For homeowners who want additional convenience, a smart garage door controller can provide activity notifications and remote access. These devices must be compatible with the opener and correctly connected to the safety system. They should not be installed in a way that bypasses the wall control or photo-eye sensors. Strong account passwords and two-factor authentication are recommended when available.
In many cases, the phrase garage door remote not working describes a minor issue that can be fixed in minutes. A new battery, an unlocked wall console, sensor cleaning, or a quick reprogramming procedure may restore normal operation. The key is to troubleshoot systematically rather than repeatedly pressing the button or adjusting components at random.
For local assistance, homeowners can visit Garage FL to learn more about garage door services and support options. A qualified technician can determine whether the problem is limited to the remote or connected to the opener, door hardware, or safety system.
Use professional service when the diagnosis involves springs, cables, electrical wiring, motor components, structural damage, or a door that is unsafe to move. A reliable company should explain the cause, identify the recommended repair, provide a clear estimate, and avoid pressuring you into unnecessary replacement. Ask whether the repair includes testing the reversing system and confirming that all authorized remotes operate correctly.
Get Your Garage Door Working Reliably Again
A nonresponsive remote does not always mean that your garage door opener has failed. Start with the battery, lock mode, power supply, signal range, sensors, manual locks, and programming. These checks resolve many common problems without expensive parts. If the opener shows signs of mechanical, electrical, or safety-system failure, stop testing and contact a trained garage door professional.
Do not ignore unusual noises, a door that moves unevenly, a broken spring, loose cables, or a reversing system that fails its test. The remote is only one part of a larger system, and safe operation matters more than getting the door to move temporarily. With careful troubleshooting and timely maintenance, you can restore convenient access while protecting your household, vehicles, and property.
Need help when your garage door remote is not working? Contact Garage FL for dependable guidance, professional inspection, and practical repair options. Schedule service today to identify the problem, restore secure remote access, and make sure your garage door operates safely.
Skip the YouTube rabbit hole - we'll have a tech at your door same day across Broward, Dade and Palm Beach.