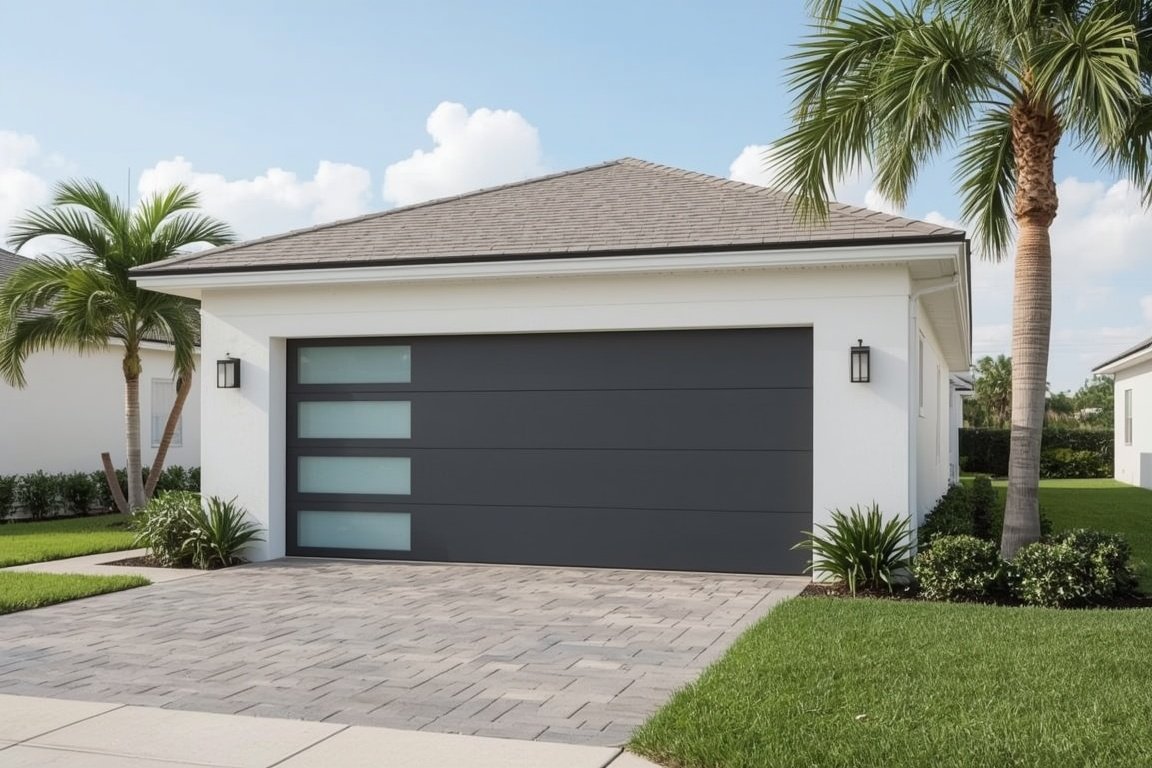
Is your garage letting in drafts, water, or pests? It might be time to replace your garage door bottom seal. This small but essential component plays a big role in protecting your garage from the elements and maintaining energy efficiency. At Garage Door Pros, we excel in swift, affordable garage door solutions in Pembroke Pines and beyond. Whether you're dealing with a worn-out seal or visible gaps under your garage door, our expert team is here to help. Replacing a garage door bottom seal is a simple yet effective way to improve insulation, enhance security, and extend the life of your garage door. Serving Fort Lauderdale and surrounding areas, we specialize in garage door repair, maintenance, and installation to keep your home safe and functional. In this guide, we'll walk you through the steps to replace a garage door bottom seal, ensuring a snug fit and long-lasting results.
Understanding the Importance of a Garage Door Bottom Seal
A garage door bottom seal might seem like a small and insignificant component, but it plays a critical role in maintaining the functionality, efficiency, and longevity of your garage door system. This rubber or vinyl strip, located at the bottom edge of the garage door, acts as a barrier that protects your garage from external elements such as water, dirt, pests, and even extreme temperatures. Understanding its importance can help homeowners make informed decisions about timely replacements and maintenance.
One of the primary functions of a garage door bottom seal is to provide weatherproofing. Without a proper seal, rainwater, snow, and debris can easily seep into the garage, potentially damaging stored items and increasing the risk of mold and mildew. According to the U.S. Department of Energy, air leaks around doors and windows, including garage doors, can account for up to 30 percent of energy loss in a home. A well-maintained bottom seal helps to insulate the garage, reducing energy costs by keeping cold air out during winter and hot air out during summer.
In addition to energy efficiency, the bottom seal also serves as a deterrent against pests. Rodents and insects often seek shelter in garages, especially during colder months. A worn or missing seal creates an easy entry point for these unwanted guests. By ensuring the seal is intact, homeowners can significantly reduce the likelihood of infestations.
Another crucial aspect is the protection of the garage floor and door components. When the seal is in good condition, it cushions the door as it closes, preventing direct contact with the concrete floor. This reduces wear and tear on both the door and the floor, extending their lifespan. Moreover, it helps in maintaining the alignment of the door, which is essential for smooth operation and safety.
"A damaged or missing garage door bottom seal can lead to increased utility bills, pest infestations, and premature wear on your garage door system," says the International Door Association (IDA).
For homeowners living in areas prone to heavy rainfall or snowfall, the importance of a bottom seal becomes even more pronounced. Water intrusion can lead to rusting of metal components and deterioration of wooden structures. In such cases, replacing the seal promptly can prevent costly repairs down the line.
Here are some common signs that indicate it's time to replace your garage door bottom seal:
- Visible cracks or tears in the seal
- Water or light seeping into the garage
- Increased presence of insects or rodents
- Drafts or noticeable temperature changes inside the garage
- Difficulty in closing the garage door completely
Replacing the bottom seal is a relatively simple and cost-effective maintenance task that can have a significant impact on your garage's overall performance. It's advisable to inspect the seal at least twice a year, especially before the onset of extreme weather conditions.
For those considering a replacement, it's essential to choose the right type of seal that matches your garage door model and local climate. There are various types available, including bulb seals, bead-end seals, and T-end seals, each designed for specific door tracks and weather conditions. You can learn more about the different options by visiting our detailed guide on types of garage doors.
If you're unsure about the condition of your garage door seal or need professional assistance, our team of experts is here to help. Visit our service page to explore our comprehensive garage door maintenance and repair solutions. We also offer specialized services in various locations, including Miramar and Plantation.
In conclusion, the garage door bottom seal is a small yet vital component that contributes significantly to the efficiency, safety, and durability of your garage. Regular inspection and timely replacement not only protect your property but also enhance the overall performance of your garage door system. For more tips and expert advice, don't forget to check out our latest updates on the blog.
Tools and Materials You'll Need
Before starting the process of replacing a garage door bottom seal, it's essential to gather all the necessary tools and materials to ensure a smooth and efficient job. Having the right equipment on hand not only saves time but also helps prevent potential damage to your garage door. One of the first things you'll need is a replacement bottom seal that matches the type and size of your garage door. These seals come in various styles, such as T-end, bulb, or bead-end, so it's important to check your existing seal or consult your garage door's manual to determine the correct type.
Next, you'll need a tape measure to accurately measure the width of your garage door. This ensures you cut the new seal to the correct length. A utility knife or heavy-duty scissors will be necessary for trimming the seal to size. You'll also want to have a flathead screwdriver or a putty knife to help remove the old seal, especially if it's stuck or worn into the track. For doors with a metal retainer, a pair of pliers may be useful to pull out the old seal and guide the new one into place.
A cordless drill or screwdriver is essential if your garage door bottom seal is attached with screws or fasteners. In some cases, you may need to remove the retainer or loosen it to slide in the new seal. Make sure you have the appropriate drill bits or screwdriver heads for the fasteners on your door. If your garage door has a track-style retainer, you might also need a lubricant like silicone spray to help slide the new seal into place more easily.
Cleaning supplies are another important component. Before installing the new seal, it's a good idea to clean the bottom of the garage door and the retainer track. Use a rag, mild detergent, and water to remove dirt, debris, and any remnants of the old seal. This helps the new seal adhere better and ensures a tighter fit, improving insulation and protection against pests and moisture.
For those who are unfamiliar with garage door components or need professional help, it's wise to consult a trusted service provider. You can learn more about available options by visiting our service page, where we offer expert assistance for all types of garage door maintenance and repairs. Additionally, if you're unsure about the type of seal or installation method, our FAQ section provides helpful answers to common questions.
Safety gear should not be overlooked. Wearing gloves can protect your hands from sharp edges on the door or tools, and safety glasses are recommended when using power tools. If your garage door is particularly heavy or difficult to maneuver, having a second person assist you can make the process safer and more manageable.
In summary, replacing a garage door bottom seal is a manageable DIY task when you have the right tools and materials. From measuring tape and utility knives to drills and cleaning supplies, being prepared will help ensure a successful installation. Whether you're tackling the job yourself or seeking professional help, understanding what you need beforehand is key to maintaining the function and longevity of your garage door.
Removing the Old Garage Door Seal
Before installing a new garage door bottom seal, it is essential to remove the old one properly to ensure a secure and effective fit. Begin by fully opening the garage door to access the bottom edge. If your garage door has a metal retainer, you will likely see the old rubber or vinyl seal inserted into a track. Over time, this seal can become brittle, cracked, or compressed, reducing its ability to keep out water, dirt, and pests. Use a flathead screwdriver or a utility knife to carefully pry one end of the old seal out of the track. If the seal is particularly stubborn or has fused with the metal due to age, applying a small amount of lubricant can help loosen it. Once you have a grip on the seal, pull it out slowly, making sure not to damage the retainer. For wooden garage doors, the seal may be nailed or stapled in place. In this case, use a pry bar or hammer to remove the fasteners and gently pull the seal away from the door. Be cautious not to splinter the wood or leave behind any sharp objects that could interfere with the new seal.
After removing the old seal, take a moment to inspect the bottom of the garage door and the retainer track. Clean out any debris, dirt, or remnants of the old seal using a brush or cloth. This step is crucial because a clean surface ensures that the new seal will sit flush and provide an airtight barrier. If there is any rust or corrosion on a metal retainer, consider sanding it down and applying a rust-resistant primer to extend its lifespan. For wooden doors, check for signs of rot or damage that may need repair before proceeding. If you notice any structural issues or if the retainer is damaged beyond repair, it may be time to consult a professional for a more thorough inspection. You can explore our service page to learn more about professional assistance for garage door maintenance and repairs.
Proper removal of the old seal not only prepares the door for the new installation but also gives you an opportunity to assess the overall condition of your garage door. This is a good time to check for other wear and tear issues, such as loose hardware or misaligned tracks, which could affect the performance of your door. If you are unsure about the condition of your garage door or need help identifying potential problems, our team is here to help. Visit our about page to learn more about our experience and commitment to quality garage door solutions.
Taking the time to remove the old garage door bottom seal correctly will ensure that the new seal fits securely and functions effectively. This step is foundational to maintaining the energy efficiency, security, and cleanliness of your garage space. Whether you are a DIY enthusiast or prefer professional help, understanding the importance of this process will help you make informed decisions and extend the life of your garage door system.
Cleaning and Preparing the Surface
Before installing a new garage door bottom seal, it is essential to thoroughly clean and prepare the surface to ensure a secure and long-lasting fit. Over time, dirt, debris, and old adhesive can accumulate along the bottom edge of the garage door, which can interfere with the proper installation of the new seal. Begin by raising the garage door to a comfortable working height and inspecting the bottom edge for any remnants of the old seal or signs of rust and damage. Use a flathead screwdriver or putty knife to carefully remove any remaining pieces of the old seal. If the seal was attached with screws or nails, make sure to remove them completely to avoid interference with the new installation.
Once the old seal is removed, thoroughly clean the surface using a stiff brush or broom to sweep away loose dirt and debris. For more stubborn grime or adhesive residue, a mixture of warm water and mild detergent can be used. Apply the solution with a sponge or cloth and scrub the area until it is clean. Rinse with clean water and allow the surface to dry completely before proceeding. This step is crucial because moisture or leftover debris can prevent the new seal from adhering properly or fitting snugly into the track.
In some cases, especially with older garage doors, you may notice rust or corrosion on the metal surface. If this is the case, use a wire brush or sandpaper to remove the rust, then wipe the area clean with a damp cloth. Applying a rust-inhibiting primer or paint can help protect the metal and extend the life of your garage door. Ensuring a smooth, clean surface will not only make the installation process easier but also improve the effectiveness of the new seal in keeping out drafts, pests, and moisture.
It is also a good idea to inspect the garage door track and bottom retainer channel during this process. If the retainer is bent, damaged, or clogged with debris, it may need to be repaired or replaced before installing the new seal. A well-maintained retainer ensures that the seal fits securely and functions as intended. If you are unsure about the condition of your garage door components, consider consulting a professional for guidance. You can learn more about professional services by visiting our service page.
Taking the time to properly clean and prepare the surface before installing a new garage door bottom seal can save you time and frustration in the long run. It ensures a better fit, enhances the durability of the seal, and contributes to the overall performance of your garage door. For more information about our company and the services we offer, feel free to visit our about page. Whether you are tackling a DIY project or seeking professional assistance, starting with a clean and well-prepared surface is the foundation of a successful garage door seal replacement.
Measuring and Cutting the New Seal
Once the old garage door bottom seal has been removed and the surface cleaned, the next crucial step is to accurately measure and cut the new seal to ensure a proper fit. Begin by measuring the width of your garage door using a tape measure. It is essential to measure from one end of the door to the other, ensuring the tape is straight and level for an accurate reading. This measurement will determine the length of the new seal you need to cut. Always double-check your measurement to avoid cutting the seal too short, which could lead to gaps and reduced insulation.
After obtaining the correct measurement, lay the new seal flat on a clean surface. If the seal came in a roll, allow it to rest for a few minutes so it can flatten out, making it easier to handle. Using a straight edge or ruler, mark the measured length on the seal with a marker or chalk. Be sure to mark it clearly and double-check the measurement before proceeding to cut. A utility knife or heavy-duty scissors can be used to make a clean, straight cut. Take your time during this step to ensure the cut is precise, as an uneven edge can make installation more difficult and may compromise the seal's effectiveness.
Some garage door seals are designed with T-shaped or bead ends that slide into a track on the bottom of the door. If your door uses this type of seal, ensure the cut end matches the original profile to allow for a smooth installation. If your garage door has a retainer that holds the seal in place with screws or nails, make sure the new seal aligns properly with the existing holes or fasteners. In either case, a well-cut seal will make the installation process much easier and more secure.
Before installing the new seal, it's a good idea to inspect the bottom of the garage door for any damage or warping that could affect the seal's performance. If you notice any issues, consider addressing them before proceeding. For more information on garage door maintenance and repair, visit our blog where we share helpful tips and expert advice.
Properly measuring and cutting the new garage door bottom seal is essential for maintaining energy efficiency, keeping out pests, and protecting your garage from water and debris. A snug, well-fitted seal can significantly improve the overall performance of your garage door. If you're unsure about the type of seal you need or how to install it, our team of professionals is here to help. Learn more about our expert services by visiting our service page or reach out through our contact-us form for personalized assistance.
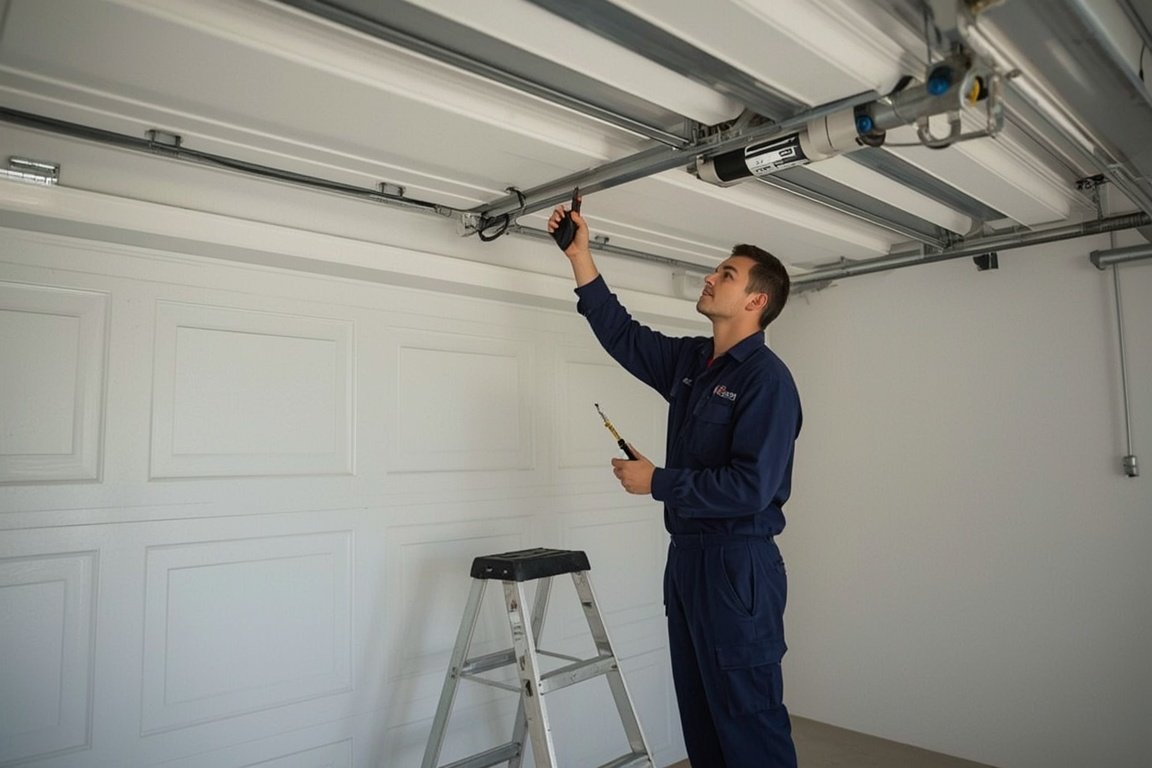
Installing the New Bottom Seal
Once the old garage door bottom seal has been removed and the surface is clean and ready, the next step is to install the new bottom seal. This process is crucial for ensuring your garage remains protected from external elements such as dust, water, pests, and drafts. Begin by selecting the correct type of seal that matches your garage door's design. There are several types available, including T-end, bulb, and bead-end seals. Make sure the new seal is compatible with the track or retainer on the bottom of your garage door.
Before installation, lay the new seal flat in the sun or a warm area for a few hours. This helps soften the material, making it more flexible and easier to work with. If your garage door has a metal retainer, apply a small amount of lubricant to the track to help the seal slide in more smoothly. Start feeding the seal into one end of the track, ensuring the edges are properly aligned. It's helpful to have a second person assist in guiding the seal through the track while you pull it from the other end. If the seal becomes stuck, gently wiggle it back and forth rather than forcing it, which could cause damage.
For garage doors without a track system, you may need to nail or screw the seal directly into the bottom of the door. In this case, measure and cut the seal to the exact length of the door. Use galvanized nails or screws to prevent rusting, and space them evenly to ensure a tight fit. Be sure to compress the seal slightly as you fasten it to create a snug barrier against the floor.
Once the new seal is in place, close the garage door and inspect the fit. The seal should press evenly against the floor without any visible gaps. If you notice uneven contact or light coming through, adjust the seal or retighten the fasteners. A proper seal not only improves insulation but also enhances the overall efficiency of your garage door system.
Regular maintenance of your garage door bottom seal is essential to prolong its lifespan. Inspect it periodically for signs of wear, such as cracks, flattening, or brittleness. Replacing a worn-out seal promptly can prevent more costly repairs in the future. If you are unsure about the type of seal to use or how to install it correctly, consider reaching out to a professional. Our team at GarageFL offers expert services to help with all aspects of garage door maintenance and repair.
In addition to bottom seal replacement, we provide a wide range of services including spring repairs, opener installations, and full door replacements. Learn more about our comprehensive offerings by visiting our About page. Whether you are dealing with a minor issue or need a complete overhaul, our experienced technicians are here to help ensure your garage door operates smoothly and efficiently.
Installing a new garage door bottom seal is a relatively simple task that can make a significant difference in the comfort and functionality of your garage. With the right tools, materials, and a bit of patience, you can complete this project in under an hour. However, if you encounter any difficulties or prefer professional assistance, do not hesitate to contact a trusted garage door service provider.
Testing the Seal for Proper Fit and Function
Once you have successfully installed the new garage door bottom seal, it is essential to test it thoroughly to ensure it fits properly and functions as intended. Begin by slowly closing the garage door and observing how the seal makes contact with the floor. The seal should compress slightly against the surface, creating a tight barrier without leaving any visible gaps. If you notice light seeping through or feel a draft, the seal may not be aligned correctly or could be the wrong size for your door. In such cases, you may need to adjust the seal's position or consider trimming it for a better fit.
Next, inspect the entire length of the seal from both the inside and outside of the garage. Look for any uneven compression or areas where the seal does not touch the ground. These inconsistencies can lead to water leaks, pest intrusion, and energy loss. To test the seal's effectiveness against moisture, you can spray a small amount of water along the outside of the closed door and check for any seepage inside. A properly installed seal should prevent water from entering the garage.
Another way to verify the seal's performance is by conducting a light test. Turn off the lights inside the garage during daylight hours and close the door. If you see light coming through the bottom edge, the seal may not be tight enough. This simple test helps identify areas that need further adjustment or replacement. Additionally, check for any unusual noises or resistance when opening and closing the door. A well-fitted seal should not interfere with the door's movement or cause it to stick.
It's also important to consider the type of garage floor you have. Uneven or sloped surfaces may require a more flexible or thicker seal to ensure full contact. In such cases, opting for a heavy-duty rubber seal or a threshold seal might provide better results. If you're unsure about the best seal for your specific garage setup, consulting a professional can save time and ensure optimal performance. You can learn more about professional services on our service page.
Regular maintenance checks are crucial even after a successful installation. Over time, seals can wear out due to weather exposure, friction, and general use. Make it a habit to inspect the seal every few months for signs of cracking, hardening, or detachment. Promptly addressing these issues will help maintain the integrity of your garage and prevent costly repairs in the future.
If you encounter persistent issues with your garage door seal or other components, it may be a sign of a larger problem. In such cases, reaching out to experienced technicians can provide a long-term solution. Our team is always ready to assist you with any concerns. Feel free to visit our contact-us page to get in touch with our experts.
Ensuring your garage door bottom seal is properly fitted and functional not only protects your garage from external elements but also enhances energy efficiency and prolongs the life of your garage door system. Taking the time to test and adjust the seal after installation is a small step that yields significant benefits in the long run.
In conclusion, replacing a garage door bottom seal is a relatively simple yet essential maintenance task that can greatly improve your garage's insulation, keep out pests and debris, and enhance overall energy efficiency. By following the step-by-step process - removing the old seal, cleaning the track, and installing a new one - you can ensure a snug, weather-tight fit. Whether you're a seasoned DIYer or a first-timer, taking the time to replace your garage door bottom seal can save you money and prevent future issues. With the right tools and a little effort, your garage will be better protected and more comfortable year-round.
FAQs
How do I know which bottom seal type my garage door uses?
Look at the aluminum retainer strip along the bottom edge of your door. T-slot retainers have two parallel channels; a single-channel retainer holds J or P seals; a bead-receiver retainer has a rounded slot. Take a photo of the profile to match it at a hardware store or send it to your garage door technician.
Can I replace just the rubber seal without replacing the retainer?
Yes, in most cases. If the aluminum retainer is straight and undamaged, slide the old rubber out and insert the new rubber in. Only replace the retainer if it is bent, cracked, or the channels have widened enough that the seal slips out during door operation.
How long does a garage door bottom seal last in Florida?
Typically 3 - 5 years in South Florida due to UV exposure, summer heat, and humidity. Premium EPDM rubber seals last longer than standard vinyl. Inspect yours annually when you lubricate the door springs and rollers.
What is the difference between a bottom seal and a threshold seal?
The bottom seal attaches to the door and moves with it. A threshold seal mounts to the garage floor and creates a raised barrier the door presses against. They complement each other on uneven floors and are especially useful in Florida to stop water intrusion during heavy rain.
How much does garage door bottom seal replacement cost in Broward County?
A professional service call for bottom seal replacement in Broward County runs $75 - $150 including parts and labor. DIY material cost is $10 - $50 depending on seal type and whether you need a new retainer. If a technician is already on-site for another repair, the seal is often added at parts cost only.
Will a new bottom seal reduce garage humidity in South Florida?
It helps reduce humid outdoor air infiltration, but it is not a complete vapor barrier on its own. Combine it with an insulated door, weatherstripping on the side and top seals, and a dehumidifier for meaningful humidity control in a South Florida garage.
Skip the YouTube rabbit hole - we'll have a tech at your door same day across Broward, Dade and Palm Beach.